Most RV maintenance shops charge $80-100+ per hour for labor. And while some jobs are well worth it, any job that you can comfortably do on your own could potentially save you hundreds of dollars.
From the get-go, let me say that if I can do this RV maintenance task…anyone can.
 Doing your own annual RV roof maintenance could save you hundreds of dollars (Photo credit: 401(k) via Flickr CC)
When the good Lord was passing out handyman skills, I must have been asleep. I’m pretty much clueless when it comes to anything handyman-ish or mechanical. I’m so bad, it is almost laughable.
But honestly, this annual RV roof maintenance was a breeze. So, if you are one of those folks who has been thinking that you’d rather pay someone to do this for you, think again and give this guide a quick read first.
Note: This article deals specifically with the sealing of items attached to a fiberglass roof. If your roof is made of another material, you’ll want to do research related to the type of roof your RV has. Some sealants and chemicals are not recommended for all roof types.
General Thoughts on Annual RV Roof Maintenance
Since we purchased Meriwether (our RV), it has been on our minds to do some preventative maintenance on the roof. We don’t have any known leaks yet, but we know that if we don’t perform preventative maintenance, we eventually will.
Figure it this way. If something is attached to the roof, it means that somewhere there is a hole between the roof and the inside of the RV where the item is attached.
On the roof side, these attached items (vent covers, rear ladder, antenna, etc.) are normally sealed from water intrusion with a self-leveling lap sealant. This sealant doesn’t last forever, though. Eventually any area previously sealed will develop cracks due to the elements.
Remember, it’s a lot faster and cheaper to do your own annual RV roof maintenance than it is to wait until you have water coming in through the roof.
Step 1: Get Up on the Roof and Take a Look
Items to bring: Water bottle, sharpie pen, small camera (most cell phones have a camera you can use).
A. The first thing you want to do is take a look around. Make sure you have a safety observer around. It could be your other half or even a neighbor. But you want someone to know you’re going up there. Brittany even teased me a little by saying she was going to put pillows down on the ground around Meriwether.
(On a completely unrelated note, this long shot of our roof in the shade for some reason makes me think of a Star Destroyer in Star Wars.)
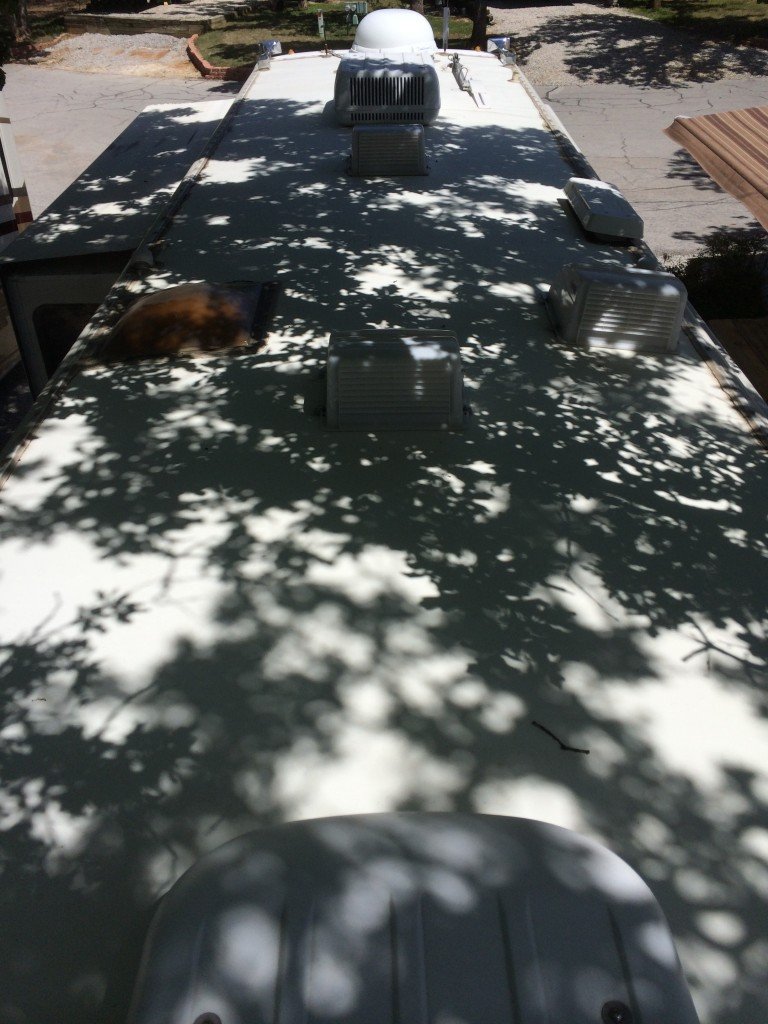 It is a little hard to see, but that’s a good thing. I was fortunate to have some shade from an overhead tree while doing my annual RV roof maintenance.
B. Once on the roof, start at the back and work your way forward toward the front of the coach. Take a look at everything that has been previously sealed by lap sealant and do a close examination for any cracks in the sealant. These could range from hairline cracks to obvious ones.
C. The obvious cracks you don’t need to mark, but any hairline cracks, go ahead and mark them with your sharpie pen so you don’t miss them when you come up to do the work. You may want to take some photos to document your work as well.
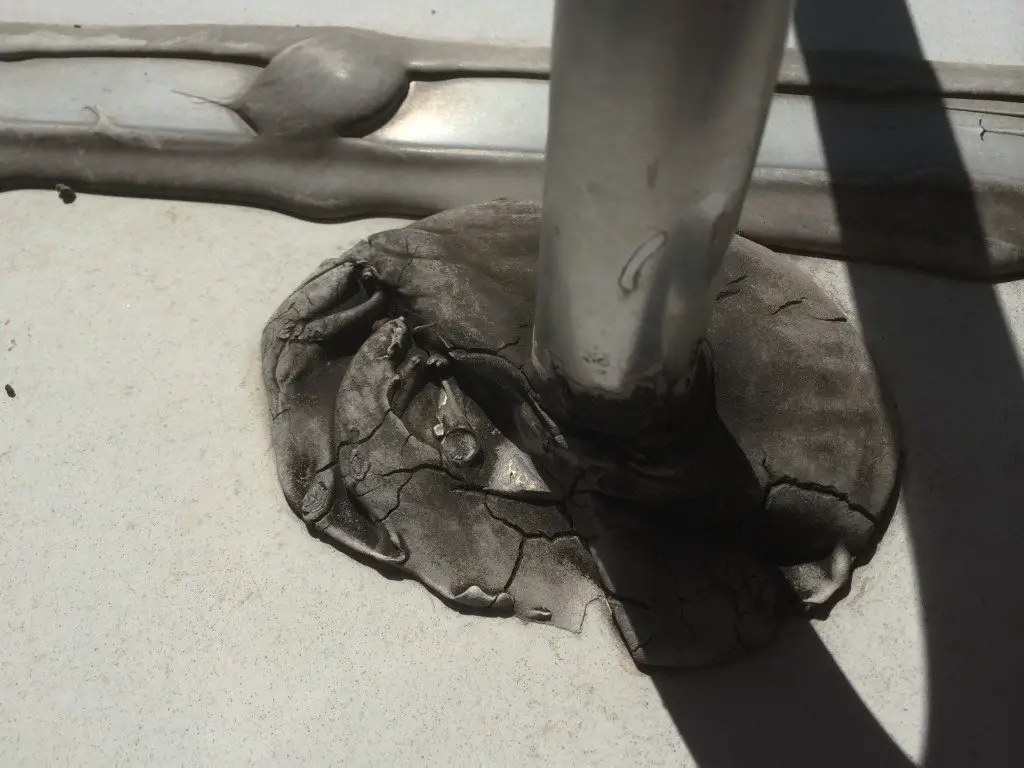
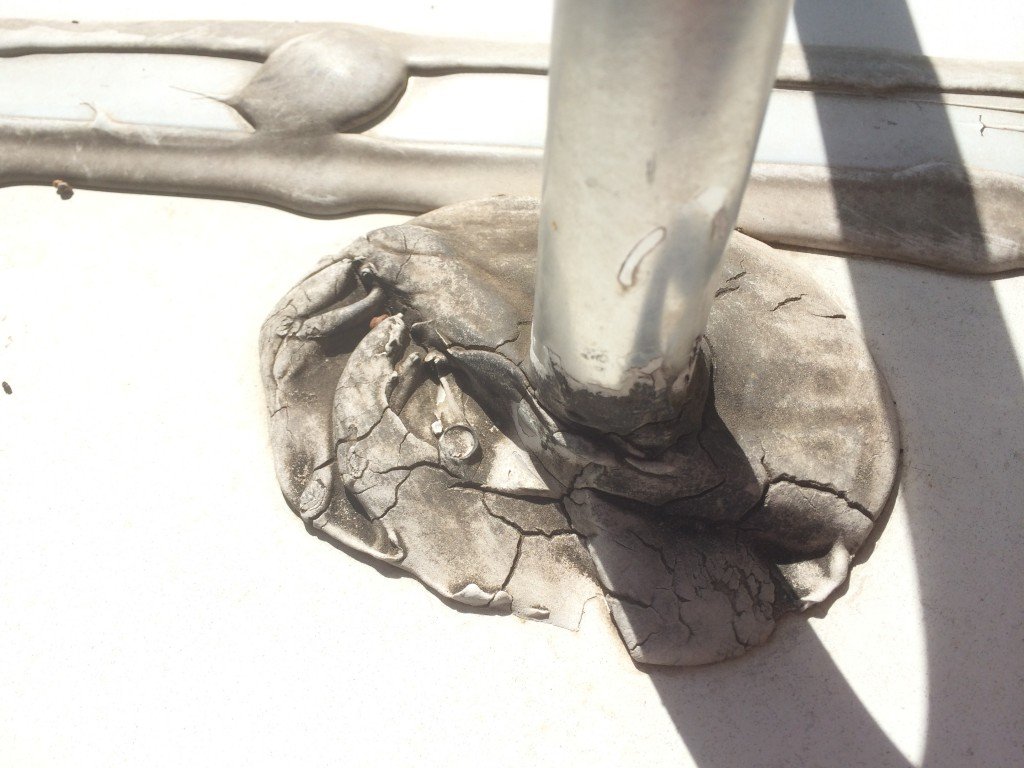
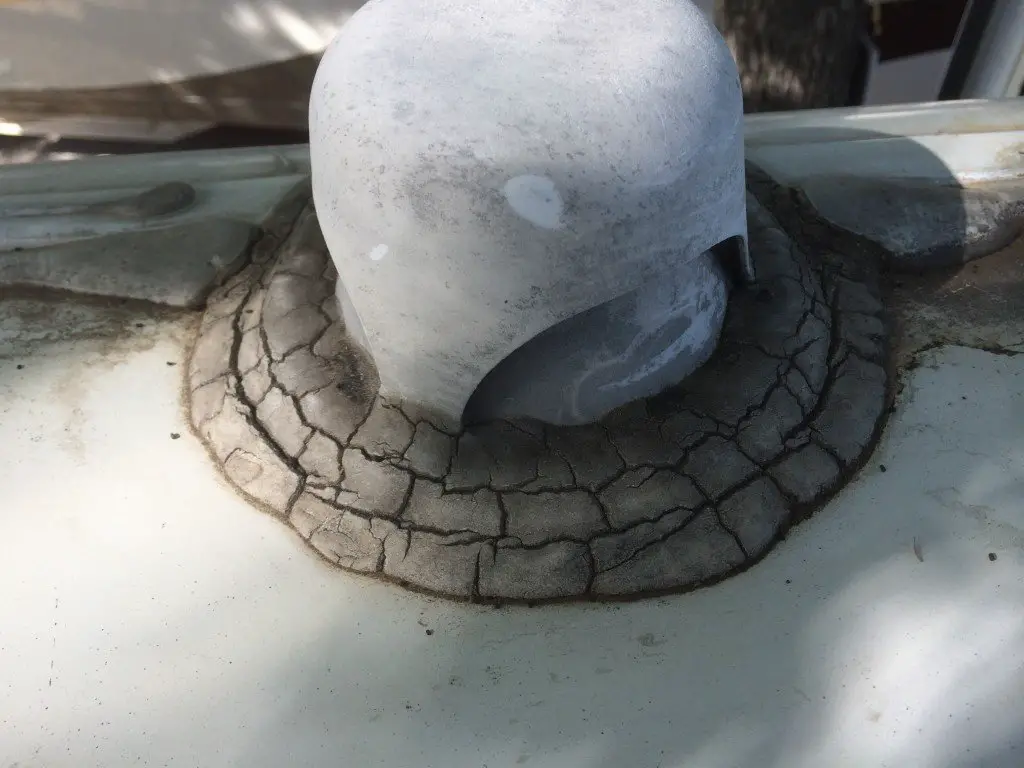 These cracks are pretty obvious. But this is what you’re looking for when doing your annual RV roof maintenance.
D. Check specifically around the areas where the ladder attaches to the roof and the vents for the tanks and the shower, as these tend to crack more readily than other areas. Once at the front of the coach, do a second sweep on your way back to the ladder and double check in case you missed anything.
Note: Do not use lap-sealant on skylights. They make another product for this.
Ok, now you have a rough idea of how many tubes of lap sealant you’ll need to do the roof. Figure for every four areas, you’ll probably need about a tube.
Drink some water and head back down to grab your tools and supplies for the job.
Step 2: Gather the Tools and Supplies Needed
You don’t need your entire toolbox up there. I recommend wearing an old pair of work jeans, as this lap sealant can be pretty sticky stuff. Other than that, here is a short list of the items you’ll need:
- 1 caulking gun
- 1-2 tubes of self-leveling lap sealant (I used Dicor self-leveling lap sealant)
- 1 pair of standard pliers
- 2 adjustable wrenches
- 1 old toothbrush
- 1 can or bottle of mineral spirits
- 1 roll of putty tape
- 2-4 pair of disposable nitrile gloves
- 1 roll of paper towels
- 1 bundle of rags
- 1 disposable trash bag
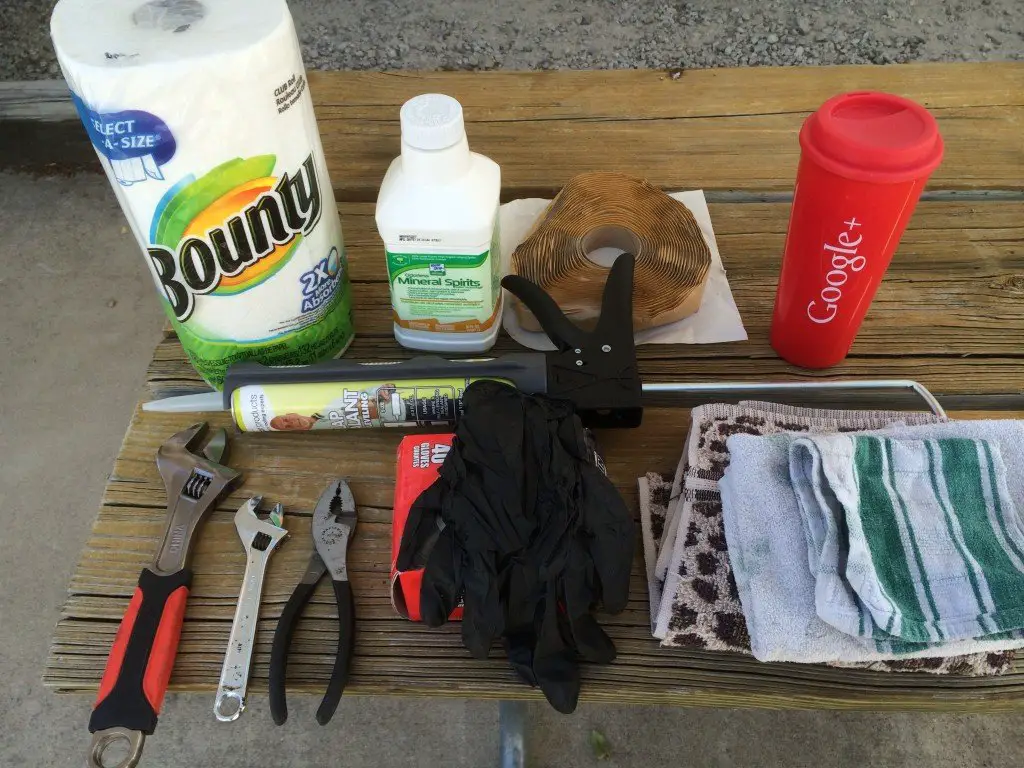 Tools and supplies needed for annual RV roof maintenance as it relates to lap sealant.
That’s it. Now that you have all the tools, let’s get onto the job itself.
Step 3: Git ‘er Clean
Again, I suggest you start at the back of the coach and work your way forward. You’ll notice when you first found items that were previously sealed with lap sealant that the weather tends to blacken the old sealant. This is really dirt and grime, and it needs to be cleaned off so the new sealant you’re laying down will stick.
 Old lap sealant needs to be cleaned with mineral spirits in order to have the new sealant adhere.
You don’t need to remove the old lap sealant. You’re just going to touch up the areas that have cracks. If you want to remove the old sealant you can, but Dicor lap sealant is designed to be put on in layers.
So the next step is to put on your disposable nitrile gloves and wipe down all of the areas you’re going to apply sealant to with the mineral spirits and a rag. You’ll find at times that it’s easier to use a paper towel or the old toothbrush for the harder to reach areas, so go ahead and use those as needed.
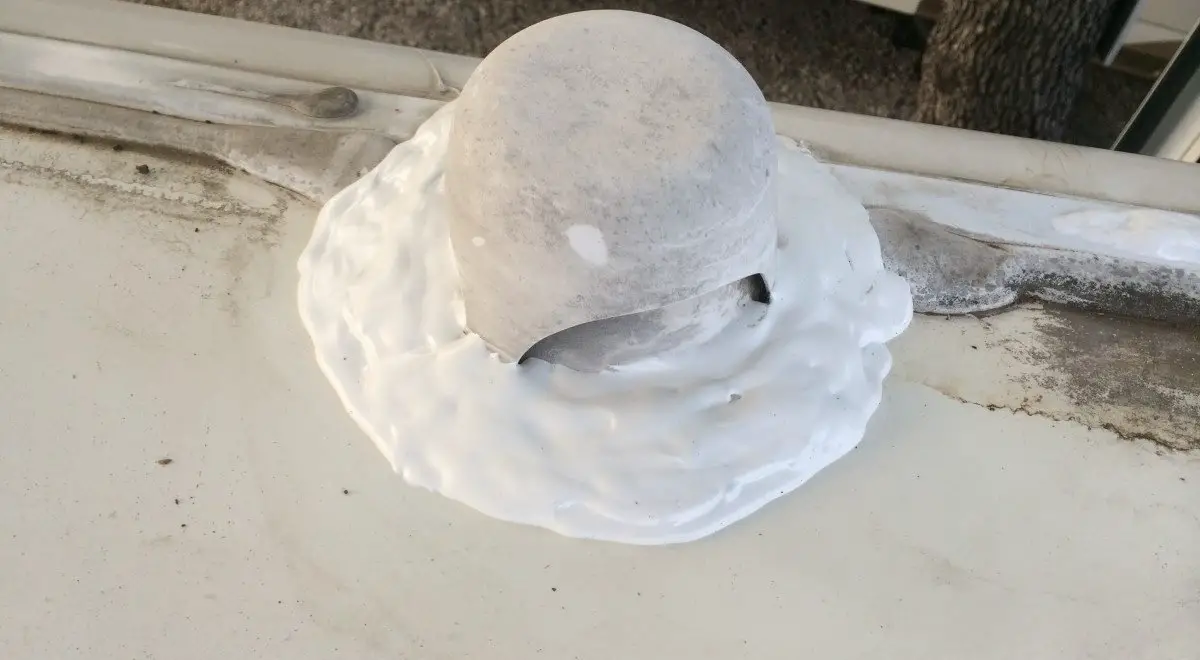
Once you’ve wiped down the old lap sealant with the mineral spirits and some muscle, you’ll find they become white again.
 As you clean off the old sealant with mineral spirits you’ll notice that it starts to become white again.
These areas need to dry completely in order to put sealant on them, so move onto the next area and wipe that down. Get all your wipe downs done first.
The reason you want to do all of your cleaning first is once you’ve opened up the tube of lap sealant, you’ll want to use it all right away. If you have to pause to clean off another section, it can be a messy mistake.
By working from the back of the coach to the front, by the time you are done wiping down the areas on the front of the coach, the back will be dry enough for you to begin the sealing process.
Step 4: Git ‘er Sealed
Now that all your surfaces are clean, break out your caulking gun and load it with your self-leveling lap sealant. Make sure you are in a well ventilated area – outside is good. This lap sealant can make you a little dizzy, which really sucks when you are on a roof. But if you are outside, it will help tremendously.
Now go to the areas you noticed or marked earlier, again starting at the back of the coach, and begin to apply the sealant liberally.
Don’t worry about making it look pretty. It’s on the roof and, unless your friends have a helicopter, they’ll probably never see how hard you worked anyway.
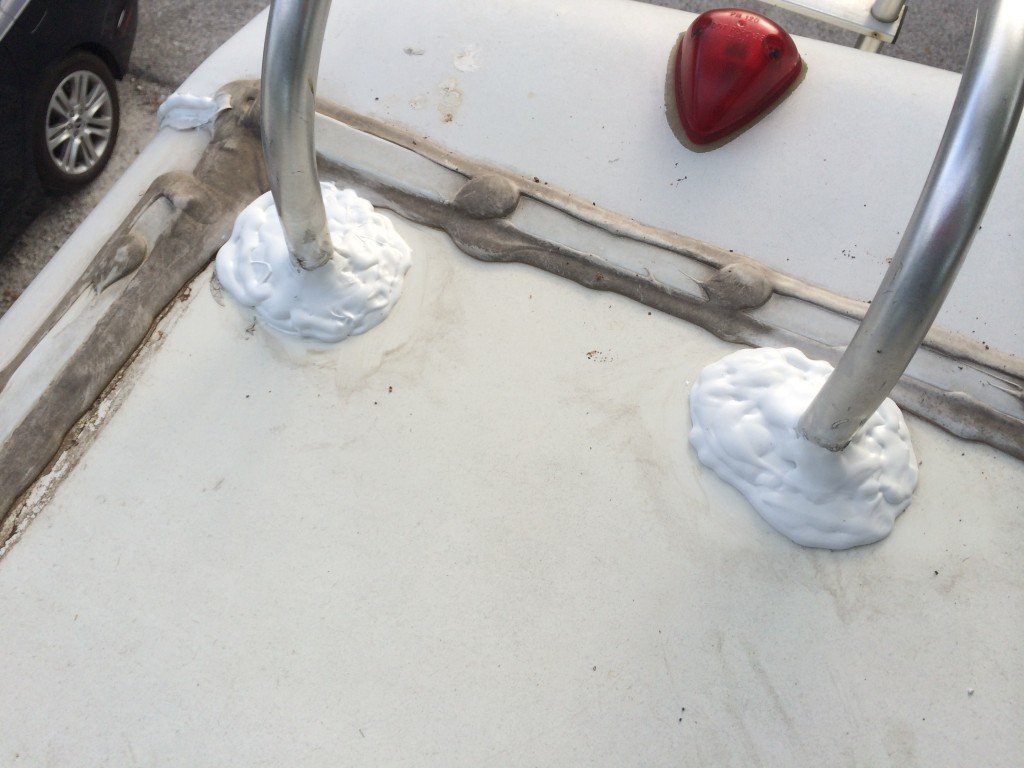 Apply the self-leveling lap sealant liberally, making sure to fill in all cracks.
The important thing here is to make sure you fill in all of the cracks, from the hairline cracks to the major ones. Because the sealant is self-leveling, it will seep into the cracks and fill them up on its own.
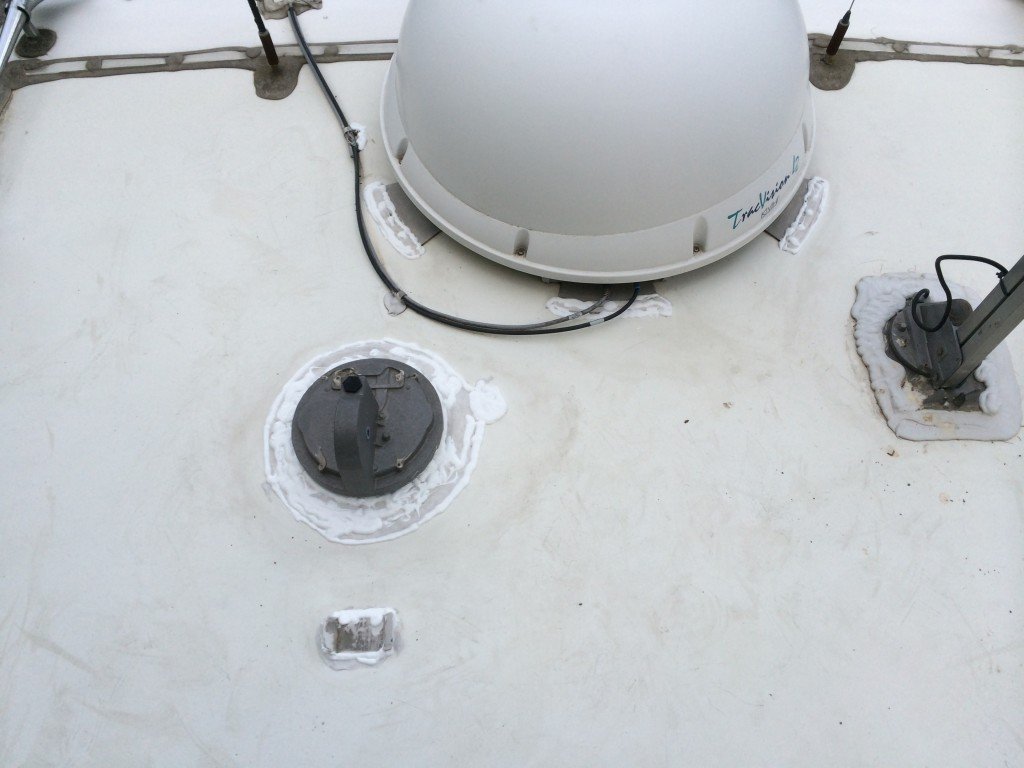
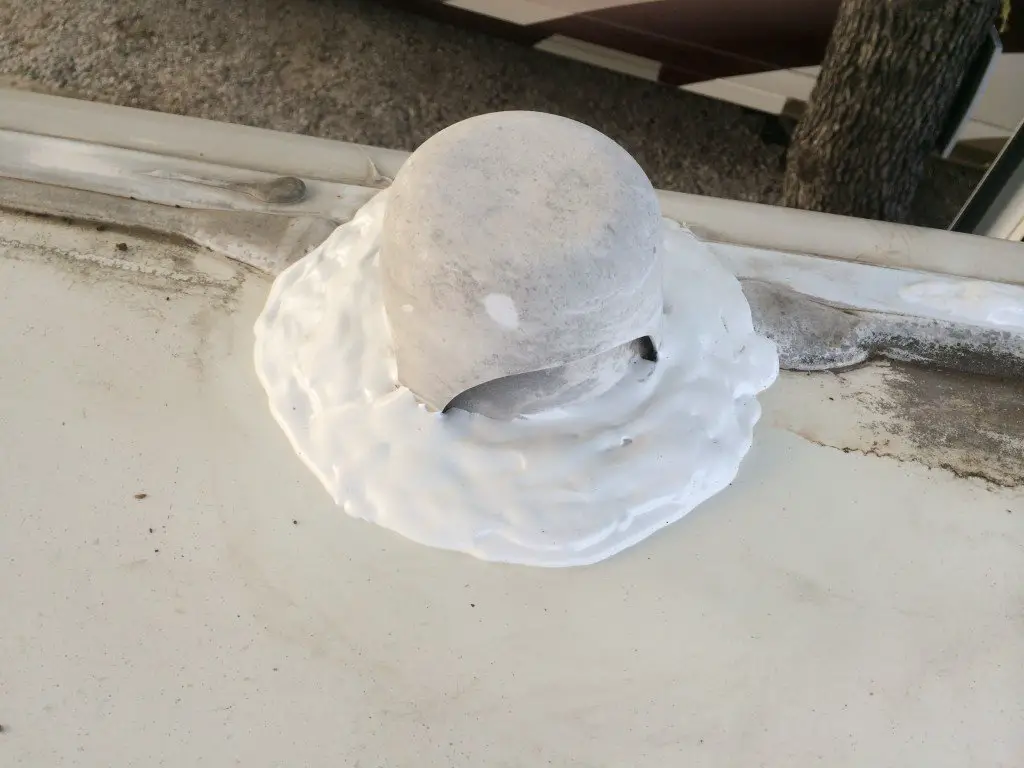 A vent cover that has just been sealed by a new layer of self-leveling lap sealant during annual RV roof maintenance.
What you should see when you are done is a nice white layer of lap sealant that has no visible cracks or openings. On your way back to the ladder, double check all of your new sealant and make sure you don’t see any cracks and that you didn’t miss any spots you originally marked.
 Don’t forget your touch-ups that you marked with a sharpie!
That’s it. You’re done!
It took me about 3 hours to do my roof maintenance. Hmmm…let’s see…3 hours x $80-100 per hour…
At minimum, you’ve earned yourself an ice cold glass of sweet iced tea. Go on and enjoy a glass, knowing you’ve just saved yourself enough in repair costs for that new retractable ladder you’ve been pining for.
Final Thoughts on Annual RV Roof Maintenance
Remember not to use this self-leveling lap sealant on vertical surfaces. It only works on horizontal surfaces. Also don’t use it on skylights. Lastly, set yourself a reminder to check the roof again in about six months. It should still be fine in six months time, but it’s a good thing to check just in case.
Lastly, I’d love to hear your thoughts, advice, and questions, so please don’t hesitate to comment below! -E


Great tips and very timely since we are about to do this very thing. I’m sharing this on Tales From the Mutiny page too!
Awesome Lynn! Appreciate the share. I think the guy next to me may have read my article. I’m working from the couch this morning and he’s up on the roof and he just waved to me. Haha. So let me know how your roof goes! Miss you guys and hope to connect again soon!
Eric, you’re a great teacher. All of your instructions were clear and easy to understand. Neither myself or my husband are handymanish at all! But, by the end, I feet that we really could do this type of repair ourselves. Thanks!
Oh, I’m gonna share this as well. Too good not to!
Thanks Deborah, you’re very kind. I appreciate you sharing the article. We’re just getting started with this whole RV blog thing. If you do decide to give it a shot, let me know how it goes and if there is anything you learned along the way. We’re all in this together! ~ E
Great explanation! Roof maintenance is definitely one of the easiest ways for a do-it-yourself RVer to save the cost of an RV shop, since it’s such an easy task. We suggest that every RVer should keep a tube of Dicor on board at all times! We made a video about this exact topic if you’d like to see how we do it: https://www.youtube.com/watch?v=PzAjZbCEbLU
Hi, Eric. Just popped over from RVHH. You aren’t kidding about Dicor getting messy. I always say I need at least 2 tubes for a 1-tube job, because I’ll be wearing half of it! This is a great article and I learned I don’t have to scrape all the old sealant off!!! Argh!!! Thankfully I hadn’t gotten too far in the job, so this will save me loads of time!!! Thanks! ~Norma~
Great article. And thanks for not succumbing to the everything-shall-be-youtubed craze. I watch videos only when I can’t find a clear enough tutorial. What can I say, I learn a lot better from reading.
Hey there, I really liked your article. Just bought a 1977 Minnie Winnie and know nothing! Do you have anything on the sky lights? I just want to replace the two on the top, and it would seem like I should be able to do that on my own….?? I have a drill :)