

The idea of building out a functional overlanding vehicle for the purpose of an epic adventure around the globe is both exciting and daunting.
Inundated with flashy media that showcases the latest vehicles, gear and equipment, our minds are off wandering in exotic remote locations, while our pocketbooks cringe at our aspirations.
Making mistakes in an overland build can cost you a massive loss of time, ridiculous sum of money, and bucket upon bucket of sweat equity. The good news is most of these mistakes are easily avoided and, honestly, you don’t need that much stuff to have the adventure of a lifetime.
Take it from us; we’re experts at making mistakes. But we’re also extremely well-versed in learning from them.
One of the historical figures we admire, Theodore Roosevelt, is quoted as saying, “The only man who never makes mistakes is the man who never does anything.”
If you know our story at all, then you know we’re currently on our 7th year of full-time travel. We are a family that has taken a lot of risks and experienced many things throughout the journey.
The goal of this article is simple. We want to save you time, money, heartache, and sweat by sharing what we’ve learned. We will offer real-world considerations to inform your decisions, as you build out your global overlanding rig.
This article includes affiliate links. If you get excited about any of the products featured on this blog, then we’d love it if you’d shop via our links. This encourages us to continue investing time in creating useful content!
Mistakes We Made With Our First Overlanding Build
When we built our first overlanding rig, we did a ton of online research but had limited overlanding experience. As a result, we bought what the media pushes in the space and, if we’re honest, the hype of overlanding.
It’s easy to fall into the trap of focusing on gear, equipment, and vehicle modifications. All you need to do is walk around one of the major overlanding expos or trade shows and you’ll quickly see what we mean. People are obsessed with stuff.
Let me make this plain: overlanding isn’t about stuff. It is about the enjoyment of the journey. Configuring your build for the enjoyment of the journey (safety included) should be the only goal you have in mind.
Sure you need some stuff, but keep it basic. If you’d like to read my thoughts on the essentials of overlanding gear, then check this article out.
Now, with years of experience and a few international border crossings behind us, we’ll share some tips that will hopefully make your journey more enjoyable.
How to Build a Global Overlanding Vehicle Properly
When building an overlanding vehicle to take around the world, the best protip I can give is to consider payload capacity first. Payload capacity should be the cornerstone of your overlanding vehicle build.
For those unfamiliar with the term, payload capacity is simply how much weight your vehicle is designed to safely carry. This includes the weight of anything you add to your empty vehicle, including occupants and pets.
Figuring out your vehicle’s payload capacity is simple. Here is the formula:
GVWR (Gross Vehicle Weight Rating) – curb weight = payload capacity
For our 2014 Jeep Wrangler Rubicon Unlimited, the equation looks like this: 5700 lb GVWR – 4521 lb curb weight = 1179 lb payload capacity.
This means everything we add to our vehicle cannot exceed 1179 lb, in order to stay within our payload capacity. This weight adds up quickly. Let me just give you some quick examples:
Eric: 175 lb
Brittany: 140 lb*
Caspian: 40 lb
Roof top tent: 160 lb
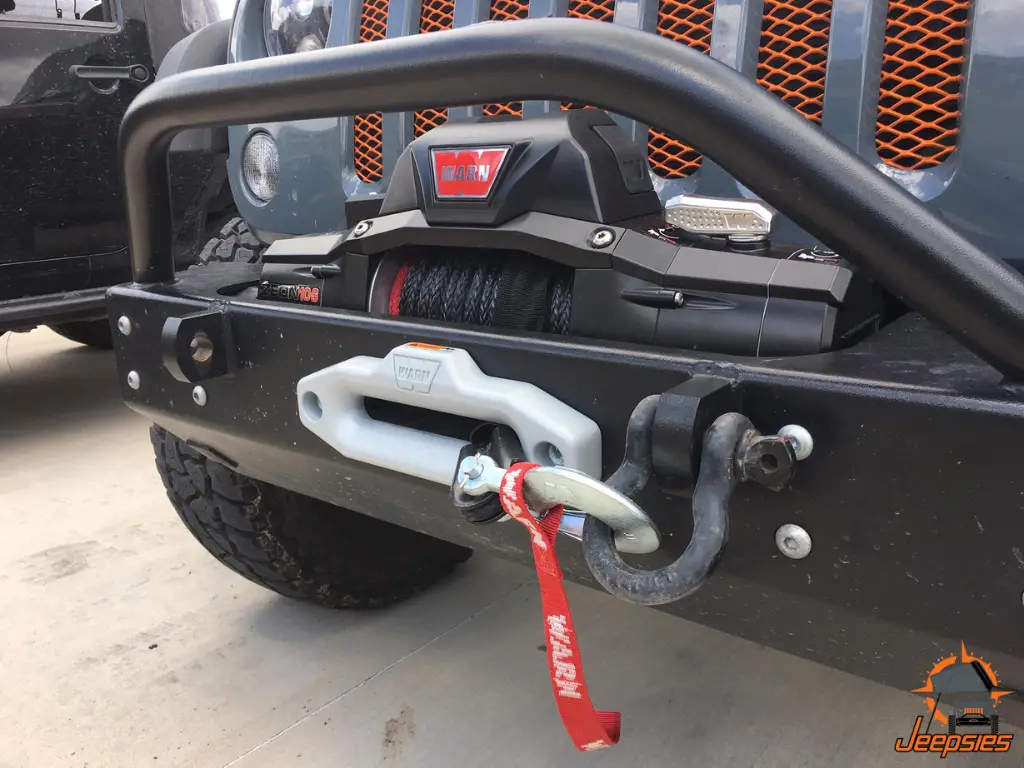
Winch: 80 lb
Just those five line items add up to 595 lb, over HALF our payload capacity! Mind you, this does not include our fridge, clothing, tools, food, water, cooking equipment, sleeping bags, auxiliary fuel tanks, awning, annex, toys, books, survival equipment, recovery gear, comms, power inverter, auxiliary lights…you get the picture, right?
Exceeding your vehicle’s payload capacity is dangerous. It is our firm recommendation that you consider payload first in any overland build. You can avoid making costly and potentially dangerous errors with a simple spreadsheet. After calculating your vehicle’s payload capacity, create a spreadsheet with the weight of everything you plan to add to your vehicle. Then subtract the combined weight from your payload capacity.
If you can’t make it work within the payload capacity of your current vehicle, then you are either in the wrong vehicle or you have too much stuff.
Don’t put yourself or your loved ones at risk. Always consider payload capacity first.
Where Will You Be Taking Your Overland Vehicle?
Are you looking forward to global overlanding or overlanding throughout North America?
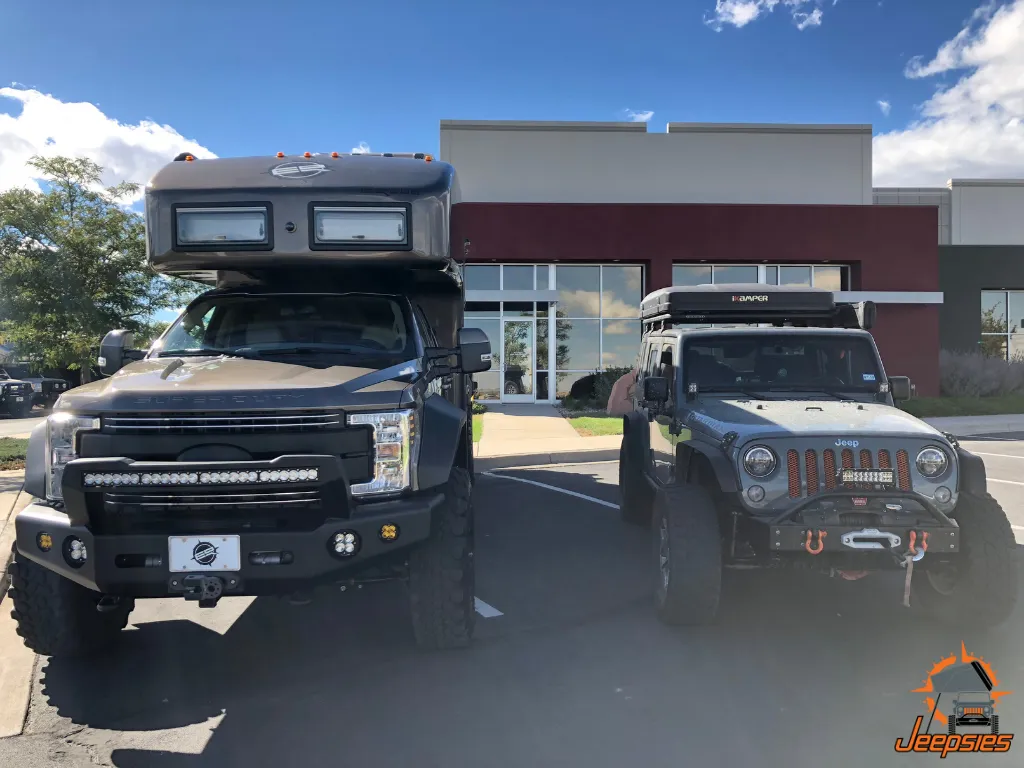
When we first started, we figured we’d give North America a go to see whether we liked the lifestyle. Now that we’re hooked, we’re planning on driving around the globe. However, building out an overland vehicle for North America and building out an overlanding vehicle capable of tackling the world are two different things.
If I had it to do over, knowing what I know today, I would have built the global overlanding vehicle first. Why build out two vehicles when you can build one that will make the journey?
As we’ve experienced North America and researched global overlanding, we’ve learned our current vehicle build is NOT suitable for global travel. So what did we do wrong? Beyond exceeding payload capacity, we didn’t plan for our toddler to turn into a teenager. He will, over the course of our journey, so we need to anticipate his needs better with our new build. We also need to stay focused on overlanding, compared to our current Jeep which was originally built for rock-crawling. Building a multi-purpose vehicle is a quick road to exceeding payload capacity.
When it comes to a globally-ready overland vehicle, there are a few other factors that should be considered.
If you’re planning on traveling in North America, then certain available luxuries like oversized tires and a completely modified drivetrain are fine. But once you start crossing into continents like South America, Africa, and beyond, those luxuries become a concern. If a tire blows or a part breaks, how will you replace it? Consider part availability, as well as local mechanic familiarity with your vehicle, as you navigate these build decisions.
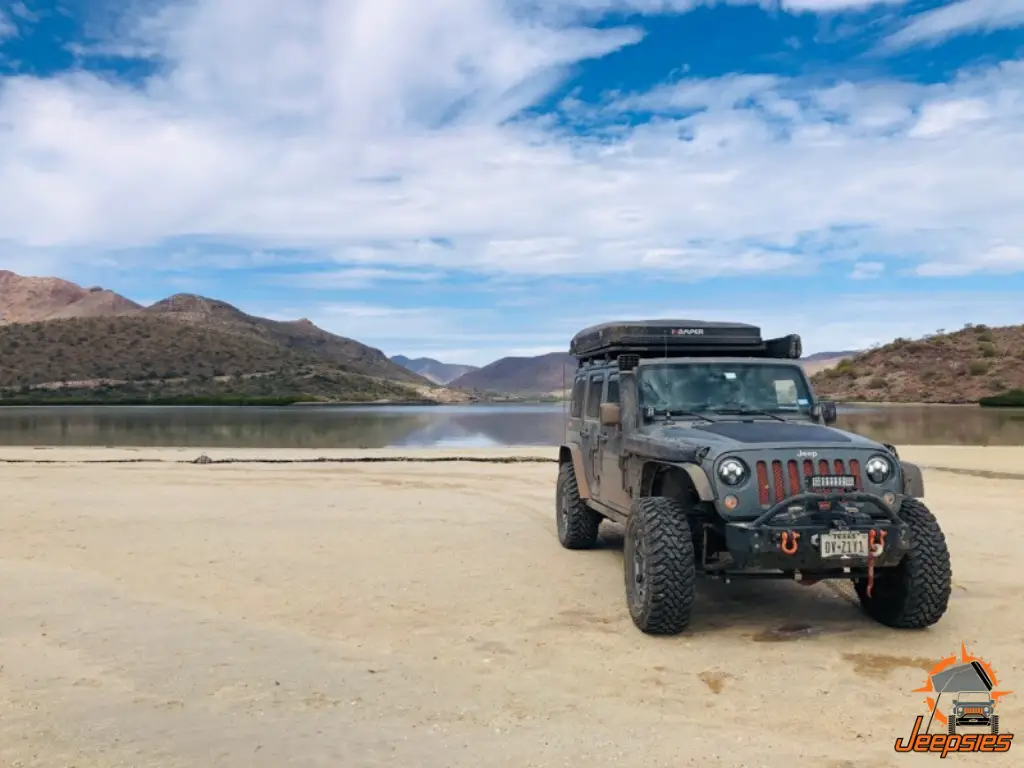
Using the lessons we’ve learned and are sharing here, we’re in the process of building out another overlanding vehicle for our global trip. GUARDIAN (our current overlanding Jeep) will remain our North America build. We’ll keep him here in the states for when we fly home to visit family and participate in events.
Three Tips For a Solid Global Overland Build
When you are starting your global overland build, here are three tips I believe are worth their weight in gold:
1. Get the Highest Payload Capacity Vehicle You Can
I know I’ve beat this horse into the ground, but I cannot stress highly enough that payload capacity is everything when it comes to your build.
The higher your payload, the more options you’ll have on how to outfit it. And you might even be able to carry that extra pair of shoes. Maybe.
2. Consider Tire Size
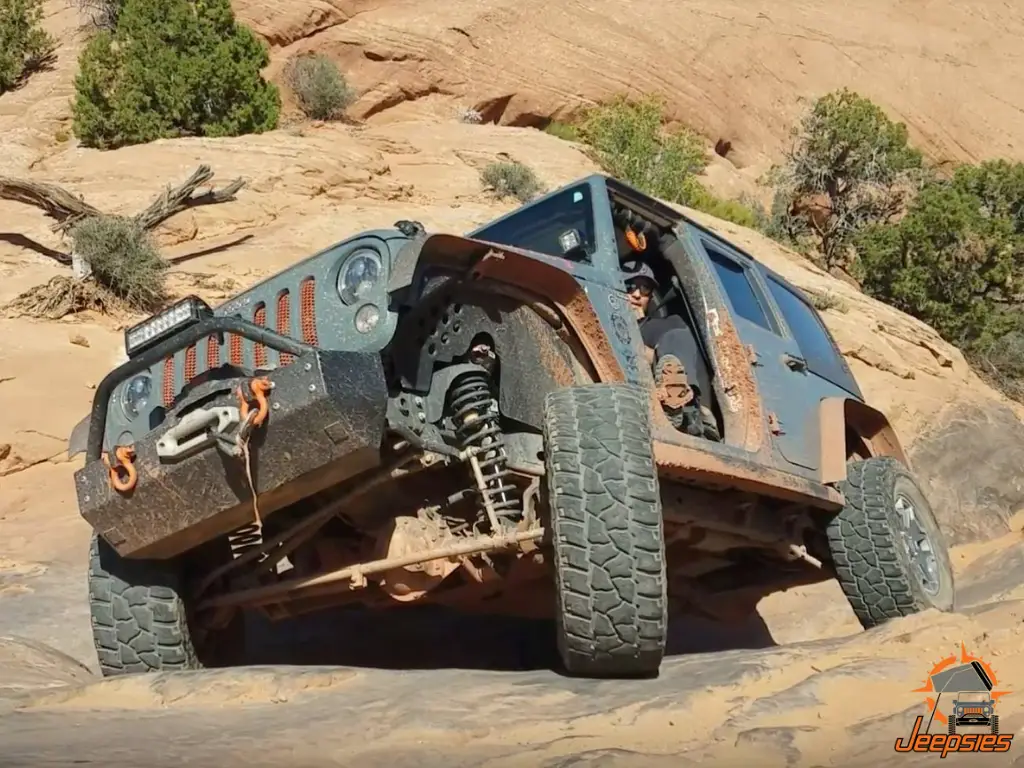
On GUARDIAN, we have 35″ tires. They give GUARDIAN an aggressive look and enables him to conquer some gnarly terrain. But for a global overlanding build, 35″ tires are not a good or practical idea. 37s and 40s are even worse. Where am I going to get one of these oversized tires in Africa when I need one? Are they even legal in the countries I want to visit?
I’m stubborn. I really wanted 37″ tires on this new build and I looked for a way to justify having them. But after listening to experienced global overlander and friend, Dan Grec of The Road Chose Me, I submitted to his wisdom and experience. If you are as stubborn as I am and still want oversized tires on your global overland rig, then do yourself a favor and watch this first: Why International Overlanders DON’T USE HUGE TIRES.
3. Less Stuff Means More Fun and Less Stress
Decrease weight. Do everything you can to lower the weight you are adding to your vehicle.
Here are some practical ways to do so:
- Purchase backpacking gear instead of camping gear. Backpacking gear is always light in weight, small in size, durable, and functional. Yes, it is usually more expensive then camping gear. But when everything you own for the trip is going with you, then it’s worth the expenditure to decrease your weight and footprint.
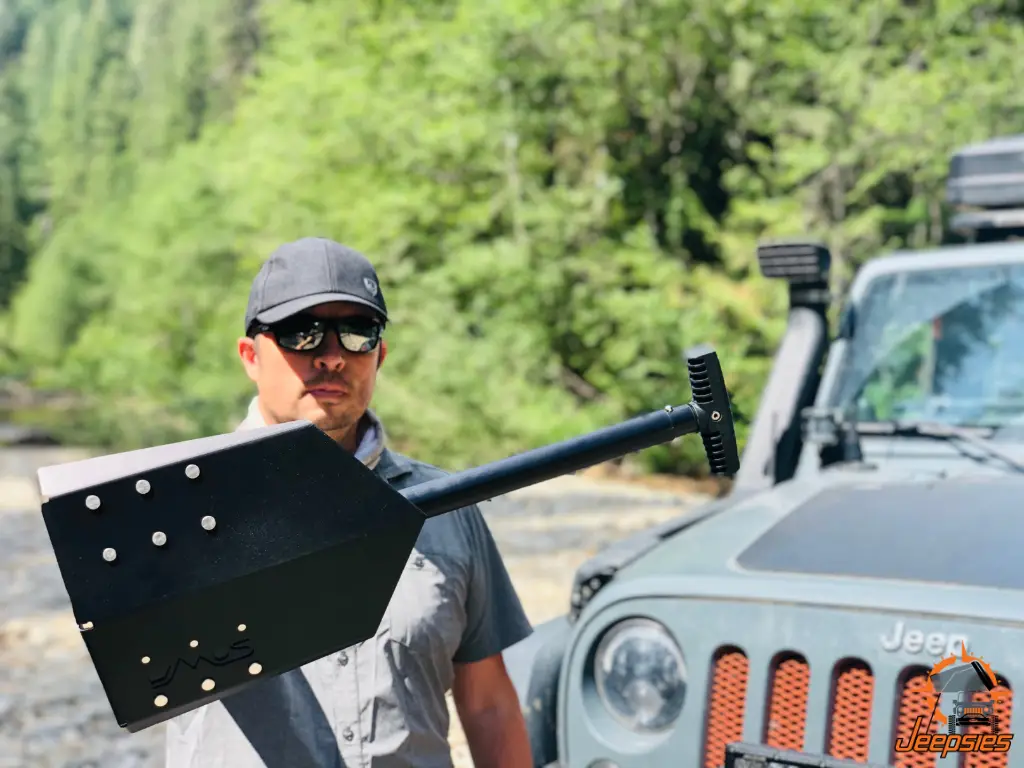
- Purchase multi-function items when possible. We have a small cooler that doubles as a toy box for our toddler, Caspian. We don’t usually need the cooler because we have an onboard refrigerator. However, should the fridge go out, we have the ability to dump out the toys and use the cooler to save some perishables.We also have a DMOS Delta Pro Shovel that can convert from a shovel to a hoe for times when we need to dig the Jeep out of a sandy area. You don’t need two tools if you can find one exceptional tool that will do both jobs well.
Even our clothing is multi-purpose. In order to save space and weight, I have three pairs of KUHL Clothing pants that convert from pants to shorts.
You may think these things are unimportant. But when you go back to your payload capacity spreadsheet, you’ll think differently. Every ounce counts.
- Consider Renting Or Buying. Is that thing you’re carting around absolutely necessary to have with you 100% of the time? Could you use someone else’s, rent it at your destination, or make a one-time purchase and then donate the item to another traveler?Let me share a few examples. We got rid of our hi-lift jack. Those bad boys are heavy! Sure, they are helpful in the right situation. But let’s face it: I’m not planning to go on any trails by myself that would require a hi-lift jack. There’s a good chance that if we’re tackling those types of trails, then someone in the group is going to have one. We still need a jack though, so we carry the Safe Jack, which we consider a much better option for us. It is lighter in weight and has a smaller footprint, too.
We also got rid of our iKamper annex room. It was really nice, but far too heavy–and it had a massive footprint in our vehicle. Instead, we went with Rhino-Rack Tapered extensions that are much lighter in weight, and more versatile to use and store.
We sold our Titan Fuel Tanks Trail Trekker II external fuel tank. While we love Titan Fuel Tank’s product, we found there was no need to add that weight to our vehicle. If you’re sticking to North America, then you probably don’t need an external fuel tank, since there are very few places that don’t have a fueling station within the range of your vehicle.
I’d recommend carrying one empty jerry can and filling it up when you are going somewhere extremely remote.
If there is any possibility of you renting something (think kayak) or buying something once and then donating it to another traveler (think second Jerry can), then fight the urge to carry it with you all of the time. Do whatever you can to reduce your footprint, weight, and wear and tear on your vehicle.
Embrace the idea that less is more.
Prioritizing With Your Global Overland Build
What are your goals for your trip? What do you really need in order to make your ideal lifestyle both enjoyable and sustainable?
When you’re out in the wild for an extended period of time in remote locations, vehicle modifications become less important than quality of life.
Where you sleep, how easy it is for you to cook a meal, and how you relax are, in our experience, more important considerations for an enjoyable and sustainable overlanding experience than vehicle modifications.
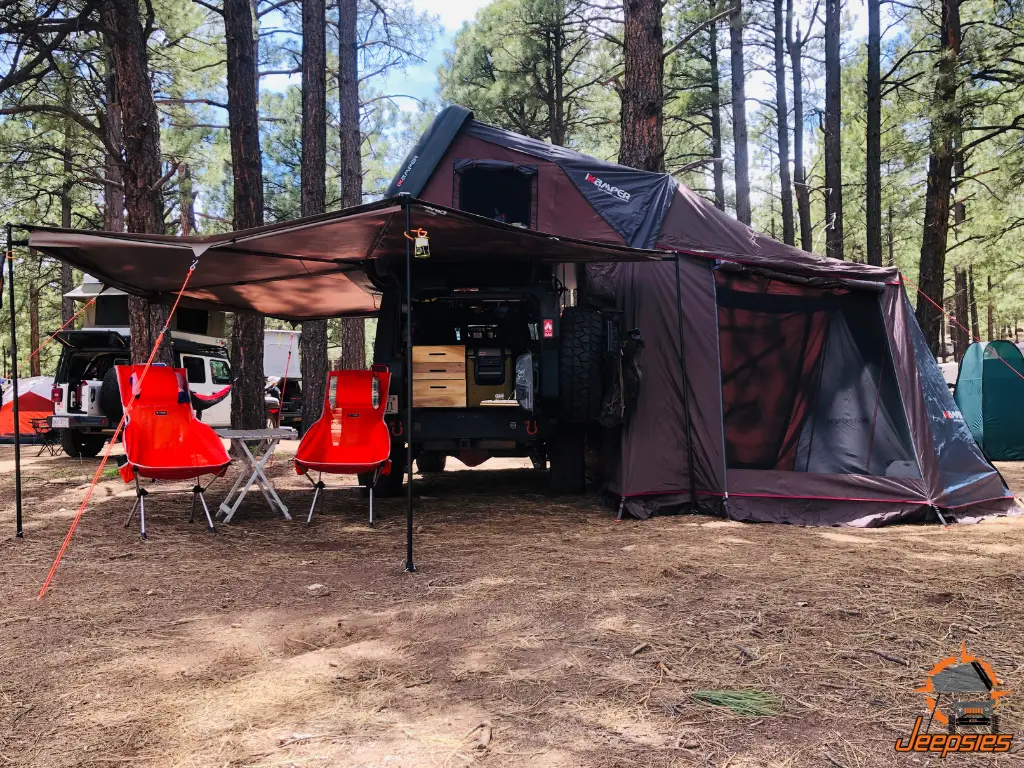
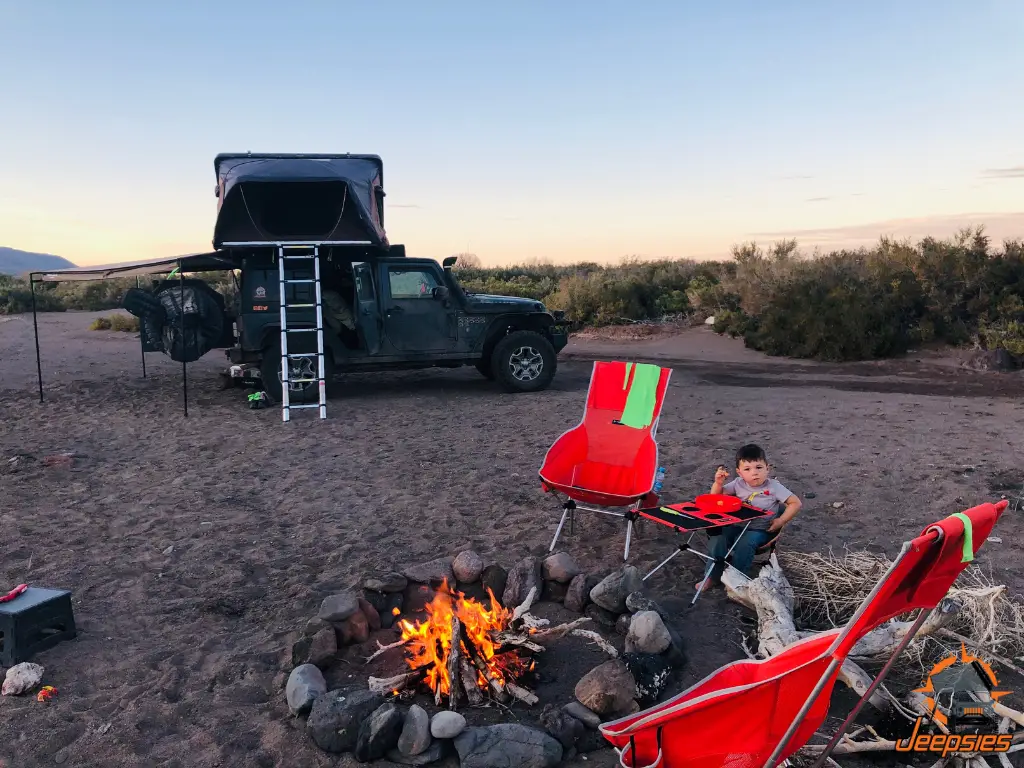
Sleeping: Sleeping is paramount for a good travel experience. Though you can opt for a ground tent, and many do, we prefer a rooftop tent or some other interior sleeping option in your vehicle. There are many reasons for this: Insulating yourself from the ground temperature, getting away from creepy crawlies, slightly more security, and a better view if you opt for a roof top tent.
If you’re going to invest in a roof top tent, then we recommend you make the deployment and stowage speed of the tent a high priority. You want to be able to set up and tear down camp quickly. This makes for a much more enjoyable experience. It takes 45 seconds to set up our iKamper Skycamp.
Also think about heating and ventilation. That’s a topic for another day, but at minimum get yourself a sleeping bag that can withstand subfreezing temperatures and make sure you have mosquito-netted windows that will allow for proper airflow.
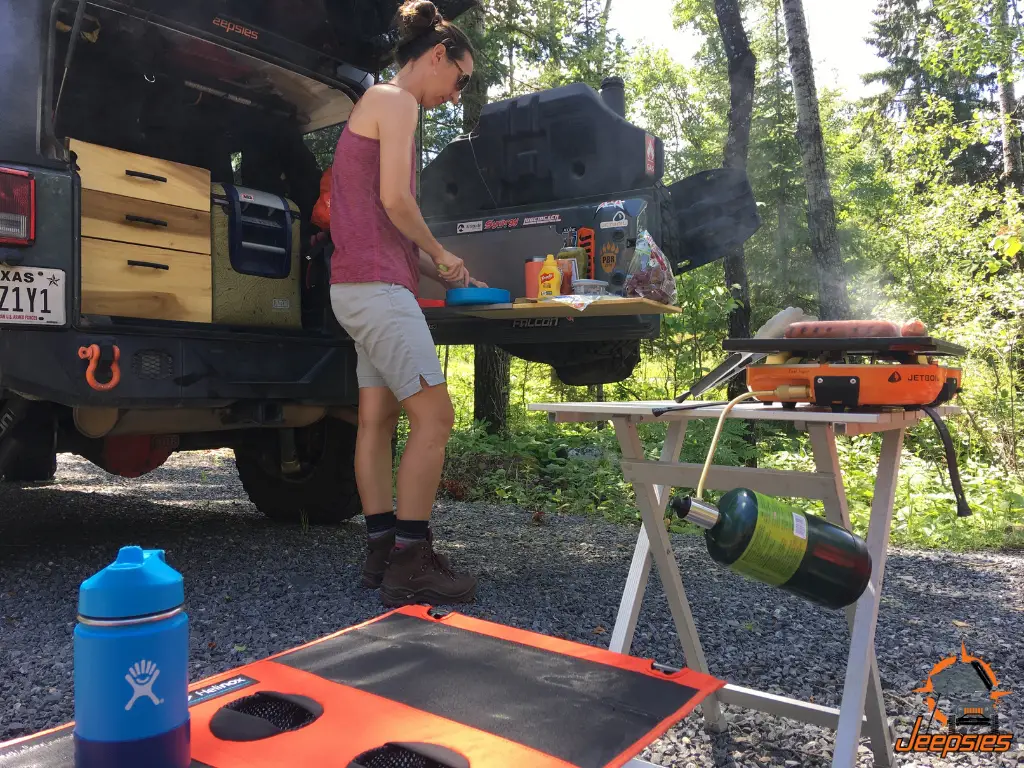
Eating: The ability to cook a meal efficiently is critical. You’ll need all of your equipment, food, and cooking surfaces to be readily accessible. If you are making three meals a day and have to juggle your gear each time, the enjoyment of the process will quickly fade as meals become a chore.
Consider carefully the placement of your cooking equipment, food, refrigerated goods, and pantry. Buy the right equipment. Just like everything else, consider footprint, weight, durability, and ease of use. Check out our Genesis Basecamp stove if you’d like some inspiration. Make the cooking process as streamlined as possible and meals will be an enjoyable experience as they should be.
Relaxing: Most of the time at your campsite will be spent outside. Weather is always hit or miss. Thoroughly consider your outdoor living area set up. Do you have a shelter, awning, or annex where you can still enjoy the outdoors if the sun is beating down or it’s pouring rain?
Think about your chairs and tables, and lighting. Think about how your outdoor living setup will withstand high winds. What about an escape from mosquitoes and other annoyances? I cannot stress enough the importance of this category. Believe me when I tell you that having a well-thought-through outdoor living setup is one of the most important aspects of your overland build.
Vehicle Modifications
It is always challenging to discuss vehicle modifications, since each vehicle is different. But there are a few things we’d like to encourage you to consider:
- Weight: When changing out your bumpers or adding anything to your vehicle, consider the amount of weight you are adding. Opt for aluminum rather than steel when possible.
- Geometry: The engineers who designed your vehicle designed it under rigorous testing procedures. Anytime you change something like tire size, lift, or axles, you are changing the geometry of the vehicle. This is potentially dangerous and could cause components to fail.
- Parts: The availability of replacement parts for your vehicle can be troublesome for stock items, not to mention aftermarket modifications.
- Suspension: Don’t skimp on suspension for your vehicle. This is probably the best investment you can make when it comes to your overlanding build.
Preparing to Build a Vehicle for Global Travel
The above article reflects lessons we’ve learned so far. We hope you’ve found it helpful and informative.
Payload capacity, knowing where you plan to take your build, reducing footprint, vehicle modification considerations, and prioritizing what matters on a daily basis are all things to consider when planning your global overlanding build.
Please feel free to ask questions or drop us a comment below. We always love talking with those who have similar passions and interests.
*This figure could change drastically depending on how many carrot cake cookies Brittany decides to eat before we head south of the border. Also, yes I know I’m in trouble if anyone has bothered to read this far.


Carrot cake cookies? Count me in!
This is great advice, though I am going to have to do a decent amount of link following to get to the real “what do I need” meat and potatoes. Thanks for the 30000 foot view and helping me narrow my shopping list.
Glad you’ve taken a look. Definitely feel free to hit us with any questions along your journey! ~ E
Trevor, did you get a chance a read this article? https://hourlesslife.com/essential-overlanding-gear/ It’s much more nuts-and-bolts, so a better place to start.