Colombia is a huge country. So the original 90-day visa you receive at the border may not be enough time to see it all! If you need to know what it takes to renew your visa and your vehicle’s temporary import permit in Colombia, then this article will guide you through the process step-by-step.
Pick your location and start early
There are multiple steps involved in renewing your visa and temporary import permit (TIP). So my number one piece of advice is to start the process early. I recommend you start the process three weeks before your visa’s expiration date. There are so many variables and things that can go awry. The last thing you want is to run out of time.
It took us eight calendar days to complete the entire process. But we spent most of that time stressed we’d waited too long and would end up having to make a run for the border. So do yourself a favor and start early.
You need to be in a Colombian city with a DIAN office in order to get your temporary import permit renewed. This is a full list of DIAN offices in Colombia. But I’m not sure whether you can renew your TIP at all of them, so check in advance to avoid issues. We used the Bogotá office.
Renew your personal visa first
Before you renew your TIP, you must renew your personal visa. This process can be done 100% online.
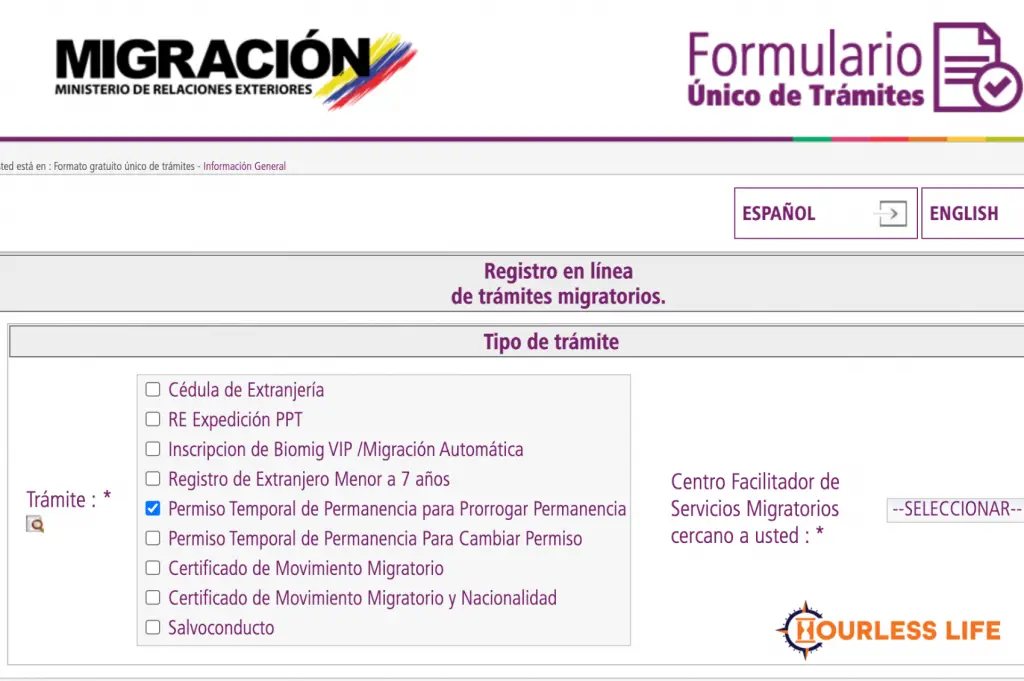
Submit an application for every person in your family using this link. Select the option for “Permiso Temporal de Permanencia para Prorrogar Permanencia”

Important: if you have multiple people in your vehicle, then start with the person whose name is on the TIP. That way, the TIP process can get done as soon as possible.
Datos personales
The form will ask your first name (nombre), last name (apellido), passport number, date your passport was issued (fecha de expedición), country that issued your passport (país de expedición), your birthdate (fecha de nacimiento), country, state, and city where you were born (lugar de nacimiento), email address, and emergency contact.
If your state or city of birth aren’t listed in the dropdown, then just select the closest thing. The same goes with your passport information. U.S. passports don’t have a state or city of issue. So we just picked whatever made sense and didn’t worry about it.
Archivos
This is the trickiest part of the form.
For each application, take a clear photo of your passport face page AND the page of your passport that shows your Colombia entry stamp.
The next step is to turn these images into a PDF file. Your computer may have that functionality or you can use an online tool like this one.
Once you have those two passport images in PDF format, you are going to need to make the files smaller (compress the PDFs). Adobe offers this service at this link. I believe you can compress two PDFs without signing in, then you need to create an account, which allows you to compress one more PDF for free. After that, Adobe wants to charge you. The best work-around is to use multiple email addresses until you’ve completed all your applications.
The visa application form says your PDF size must be 1 MB or smaller. But when I used the “High” compression in Adobe, it was good enough for the form.
Last thing before you click submit. If you read the fine print, the form requests proof of onward travel. However, as of the publication of this article, Colombia is not actually requiring proof of onward travel (we visited the Migración office in Bogotá to confirm and that’s what an official told us). For all three of our applications, the passport images were sufficient to get our visas extended.
Next step: payment
The same day you submit the online application form, you will receive an email confirmation.
Now you wait.
Eric’s visa application was submitted on a Monday. The following Saturday, we received another email requesting payment. Follow the link in the email to pay your renewal fee, which is currently $110,900 COP.
Right after making your payment, you should receive an email confirmation. This is NOT your visa renewal confirmation. It is only a confirmation your payment was received.
Final visa approval
The day after we paid, we received our visa renewal confirmation by email. The email comes with a PDF attachment, which you’ll need to renew your TIP.
Note: the PDF doesn’t always show up on mobile. You may need to go on desktop to access that file.
Renew your temporary import permit
You’re making progress! You’re legal to stay in Colombia now, but your vehicle isn’t. Now we work on renewing your temporary import permit.
Online application
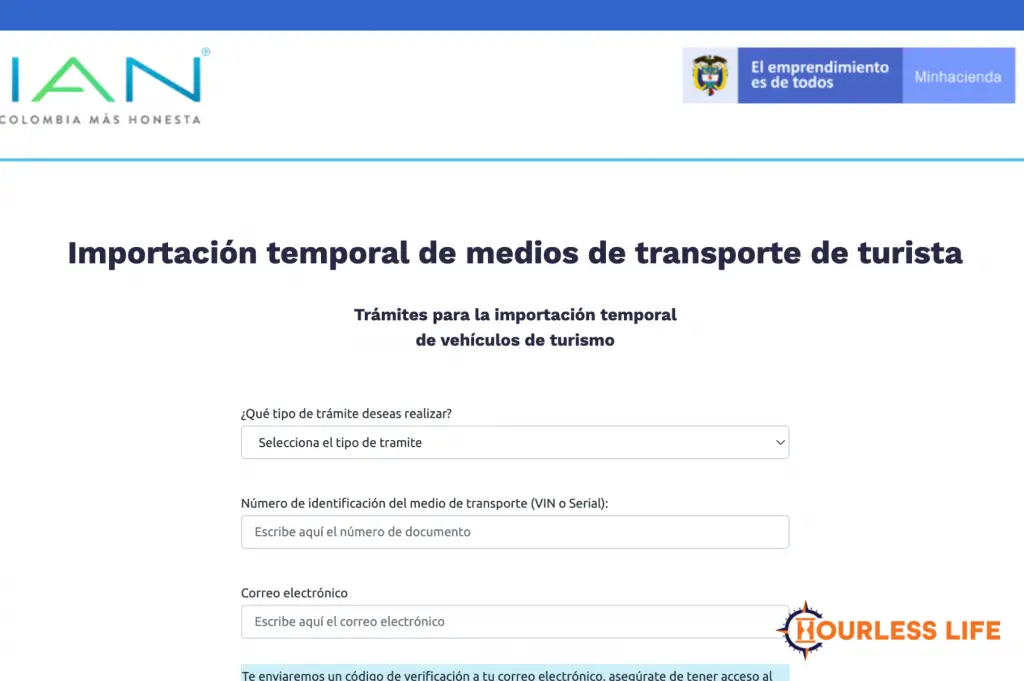
As soon as you have your visa renewal PDF, go to this link to fill out the application form.

When you get to the document section, you must attach your visa renewal PDF.
There are a few optional documents you can include to help move the needle on your extension approval. You can attach your SOAT (proof of vehicle insurance) and passport face page to confirm your identity. Lastly, if you happen to have documentation showing why you need an extension, then you can also upload that. I included the hospital report for the surgery I had earlier this month.
Once you submit the form, you should receive an email confirmation. THIS IS NOT YOUR APPROVAL.
You have one step left, and it’s the least fun part of the process.
In-person inspection
The next business day after you submit the online application, you need to take your vehicle to the closest DIAN office. Again, we went to the Bogotá office by the airport.
These are the physical documents you need to take with you:
- Passport for person on TIP
- Photocopy of passport face page
- Photocopy of Colombia entry stamp in passport
- Original vehicle title
- SOAT document (for those of you who shipped into Cartagena, this is the document you received at the insurance office to complete the import process)
- Original TIP from DIAN
- Visa extension PDF
Like every bureaucratic process in Latin America, the following steps may vary. Since Eric is the only person on our TIP, he went to DIAN by himself. He had to go through multiple security checkpoints to get to the DIAN office. He arrived around 8:30 a.m. on a Tuesday.
He presented all his documents to the DIAN agent. It took about an hour-and-a-half to enter everything into the computer. Around 10 a.m., the agent went to our Jeep with Eric, and took photos of our license plate and VIN number.
After that, the agent told Eric to come back an hour to an hour-and-a-half later. (Behind the scenes, this is the time when all the documentation is sent to the official who approves or rejects the extension.) Eric returned at 11:15 a.m. At 11:55, Eric was told our TIP extension had been approved (yay!) and he needed to sign the documents.
Before you sign your documents, make sure your name is spelled correctly. Eric’s was misspelled in five places. Though the DIAN agent said it didn’t matter, Eric reminded her it could be an issue with police in various parts of the country. So the agent corrected the name and reprinted the documents.
We were told the DIAN process would take two-and-a-half to three hours. It took almost four hours for us. So go into this like a border crossing, with patience and a smile.
The reward is 90 more days to explore Colombia!
Let us know if you need help
We tried to include all the important steps in the process of renewing your Colombian visa and TIP. If you have questions as you’re filling out the forms or going through another part of the process, then feel free to leave a comment or reach out on social media. We are happy to help however we can!
-B


Leave a Reply