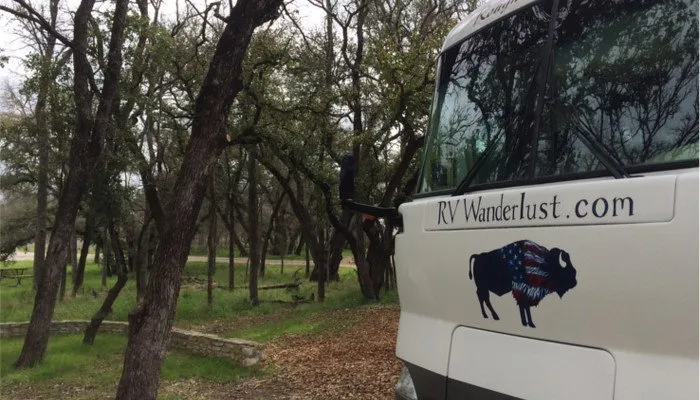

Brittany and I have been RVing around the country full time for over a year now and we have to tell you that it’s truly a wonderful life – everything we ever hoped it would be and more.
For those of you who follow our blog at RV Wanderlust, you know we live an exciting and crazy life. But this life, just like any other, presents it’s own unique challenges.
While we love the road, the road does not necessarily love our home. All homeowners want to protect their investment, and it’s no different for those of us full time RVers who live in a moving home. Any RVer who has been on the road for any length of time will tell you that arguably the hardest part of your RV to protect from miles of travel is the front end cap.
Road debris, rocks, chipping, peeling paint and bugs…tons and tons of bugs leave their mark on the front of our RVs with relentless ferocity. While the rest of the rig can stay looking great, the front end can look like it has been through a war zone.
Let me tell you, we’ve seen some ugly front ends in our journey!
So at nearly every stop, we need to inspect the front end cap for any damage. Regardless of whether or not there are any issues to resolve, we ultimately need to do a thorough cleaning of yucky bug stuff as well, and it’s just a nasty job.
Bug guts. Gotta love it.
But the truth is we don’t need to do that anymore. If you read this article in its entirety, you’ll understand why.
Disclosure: We received the Vortex treatment at no cost. We paid for the custom artwork. Also, Iron Horse RV is one of our online marketing clients. All opinions expressed in this article are our own, and we were not paid to write this article.
RV Front End Cap Solutions
 Debi and Don’s 3M film gone bad
As much as we travel, weekly inspections, rock damage and bug guts were quickly getting on our nerves. So we did some research for solutions and interestingly enough what always came up was a 3M film covering.
At first it looked like a viable option, but when we looked deeper into this “solution,” all we found were problems and complaints from folks who had it done. Tons and tons of complaints.
Do a search on the Internet and you’ll quickly find that historically folks who have turned to the 3M film front end cap are ultimately disappointed to see their investment weather, crack and dry as time passes and miles are racked up.
Ultimately, the 3M application ends up looking even worse than the damage done by miles of travel. Just take a look at this photo from our friends Debi and Don who used to have the 3M application on their RV.
What’s an RVer to do?
If we had a wish list for the perfect protection for our front end, we’d want it to be gorgeous when finished, more durable than 3M film, resistant to cracking, with the durability of a truck bed spray…and the bugs would wipe right off.
We’re only dreaming, right? Seriously, wouldn’t that be awesome?
Well, a front end cap protection that meets all of our wishes does exist, and it is called Vortex.
What Is Vortex?
Imagine a spray on bed liner for a pickup truck, but on steroids. Folks like to compare Vortex to Rhino Liner, but don’t do that. Read on and you’ll understand why.
Vortex is actually a polyurea and polyurethane blend that’s sprayed on using a 1:1 ratio of activator and resin. Mixed by a machine in the spray gun itself, Vortex comes out as one product.
Most spray on liners don’t get the needed build up to protect the surface because they take so long to dry. Vortex dries in 6 seconds. In addition, Vortex has a mechanical bond and a greater chemical bond to the surface where it’s applied. Most liners only work off of a mechanical bond, which makes them incredibly inferior.
If you’re having a hard time picturing this, think of an epoxy or JB Weld. Most people have heard of these two part mixing bonding agents. Vortex is kind of similar, but on a large scale.
How Tough Is Vortex?
This part is technical, but if you’re seriously looking for a solution, you’ll want to read on. Feel free to comment with questions.
Anyone who has worked with materials will tell you that Ultimate Tensile Strength (UTS) measures the maximum stress something withstands before failing. It’s commonly called tensile strength or ultimate strength, and in the United States it’s typically measured in pounds per square inch (PSI).
So how tough is this stuff? To put it in perspective, the tensile strength of Vortex is 3000 PSI, while the tensile strength of concrete is typically 3500 PSI.
Pretty crazy, huh?
Vortex gets its strength from the polyurea, but the benefits of Vortex don’t stop there.
As tough as it is, it’s also flexible. This is important because as you are driving along the highway, your RV flexes and jostles. The last thing you need is something that’s rock hard. So the polyurethane portion of the Vortex mix gives the substance much needed flexibility. In fact, Vortex has an elongation of 275%!
A lot of the bed liners out there (especially the DIY ones) don’t have the tensile strength or elasticity Vortex does. Most of them are just polyurethane based. Fair warning for those considering options.
Also, it takes a great deal of experience to lay this stuff on evenly and properly. You’ll see when I talk about the process itself.
Who Does This Work?
 Advanced Industrial Coatings Team: Gino and Jared Hafley
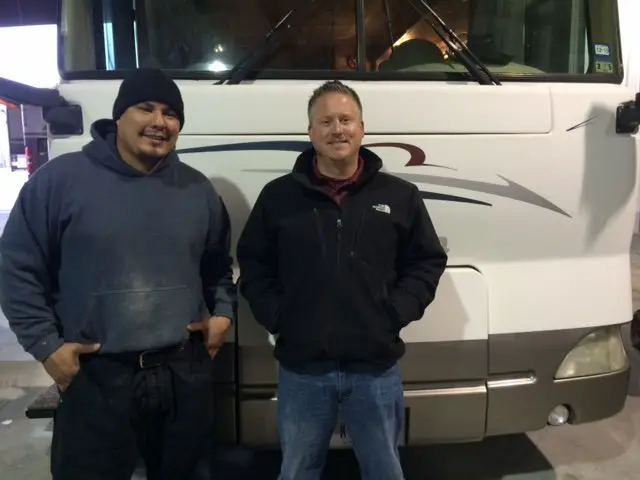
The Vortex process I’m describing in this article is the work of Iron Horse RV in partnership with Advanced Industrial Coatings. All work is performed in-house at Iron Horse RV, located at 6414 Randolph Blvd in San Antonio, Texas. All work is also warrantied through Iron Horse RV.
Daryl Waldrop, owner of Iron Horse RV, and Jared Hafley, owner of Advanced Industrial Coatings, have been doing Vortex work together for well over a decade. When interviewing them, they told me they do approximately 30 Vortex applications each year. Yep, that means they’ve easily done over 300 applications and have the process down to a science.
They also apply Vortex on roofs! Their roof process is impressive and definitely on Brittany and my upgrade wish list. Someday if we get our roof done, we’ll do another feature on the roof process alone.
If you have followup questions about Vortex for front end caps or roofs, shoot Iron Horse RV an email at service@ironhorserv.com.
How Is Vortex Applied
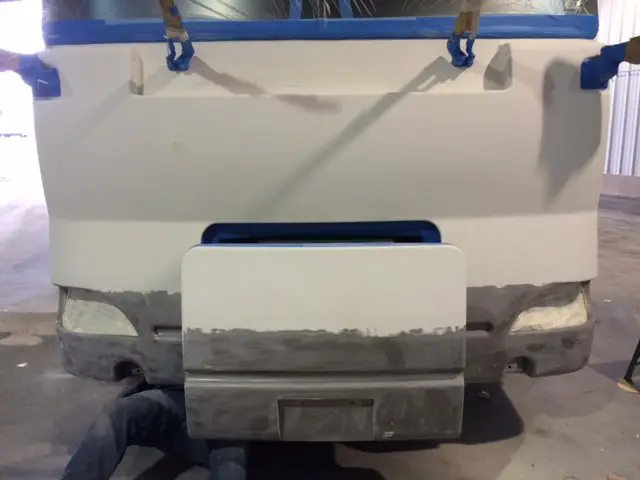
 BEFORE: RV Wanderlust front end cap before Vortex
So they just spray this stuff on, right? Wrong! It’s a painstakingly detailed process.
Jared Hafley, owner of Advanced Industrial Coatings, along with his Vortex specialist Gino are the kings of Vortex. Jared’s years of experience were evident as I watched him through every step of the process.
Take a look at the process in its entirety.
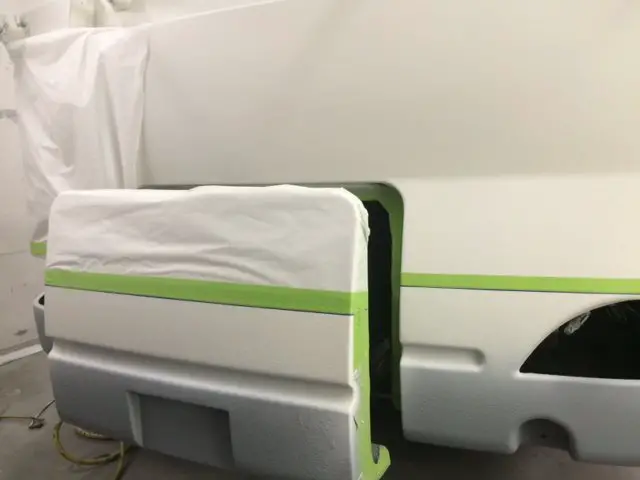
Prepping the RV for Vortex (1-2 Days)
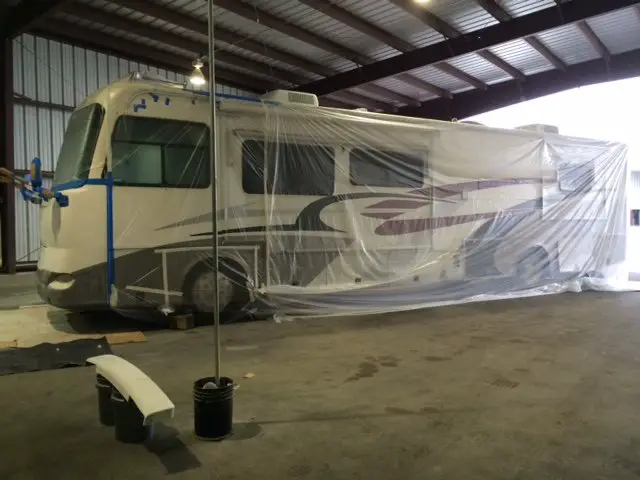 The entire RV is covered before Vortex is applied
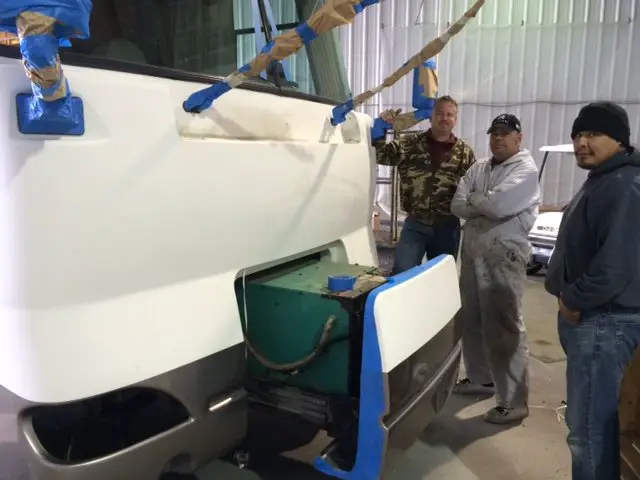 Surveying the taping process
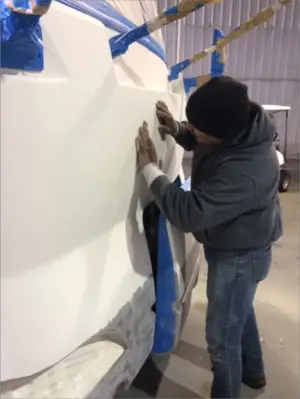 After sanding, the Advanced Industrial Coatings team runs their hands over the front of the RV to ensure its smooth
- They take tons of “before” photos of your RV. You’ll understand why in a moment.
- Every piece of the front end is labeled (e.g. driver’s sideview mirror, passenger windshield wiper)
- Everything comes off the front end or is completely masked (including mirrors, wipers, headlamps, fog lights). Every part is accounted for down to the bolts and screws that are removed.
- A complete examination of the front end is performed. Jared is looking for imperfections and the most minor body damage.
- Any imperfections are fixed with a glaze filler.
- If the RV has old 3M film, it’s blended out and covered so no lines show after the Vortex process.
- The entire RV is taped off. Yes, the WHOLE thing! For detail lines, they use wire tape.
- The front end is block sanded and every inch inspected by hand. (Interestingly, after they’re satisfied with the sanding, they run their bare hands over the entire front end with their eyes closed! It helps them feel imperfections they otherwise might not see.)
- Once the surface is perfect, it’s wiped down with denatured alcohol.
 RV front end cap after sanding
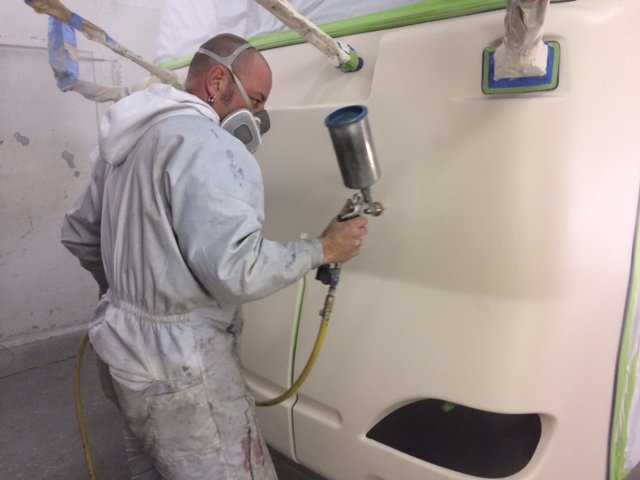
Spraying Vortex on the RV (1 Day)
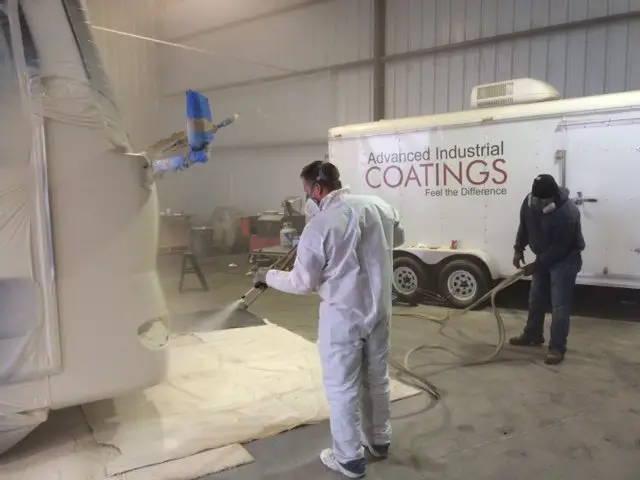 Applying Vortex
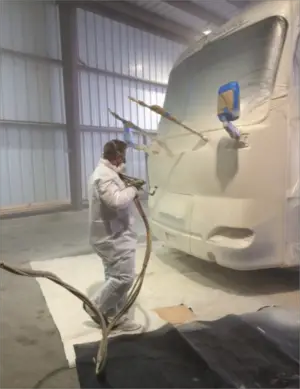 Two coats of Vortex and four layers of texturing are applied
- Spray work begins around areas requiring special detail (e.g. mirror mounts, headlight mounts, under the front end cap). Advanced Industrial Coatings does this to ensure adequate coating and solid lines for the finished product.
- The Vortex is sprayed on at 40% of the machine’s maximum output. The slower output ensures that every section of the front end cap has been sprayed equally and smoothly. Inexperienced sprayers will typically spray at 100% of the machine’s capacity, leaving an uneven mess. Be careful who you hire!
- A second pass at 40% takes place. Because Vortex dries in 6 seconds, there’s no delay between this coat and the previous one.
- The texturing process begins. After the Vortex looks even and smooth, the sprayer steps back about 10 feet and turns the machine down to 20% of capacity. This causes the Vortex mixture to come out in a finer mist. It nearly dries in the air on its way from the nozzle to the RV’s surface.
- This texturing process is repeated from 4 different angles. It’s all about detail. They spray from left to right, right to left, top to bottom and bottom to top. This ensures the texturing is flawless (it can even be customized to whatever the customer desires).
- The wire tape is pulled off at a 45 degree angle for aesthetics, which leaves a line that looks so clean a laser might as well have cut it.
- All masking is removed and trim pieces are caulked.
 Texturing with Vortex
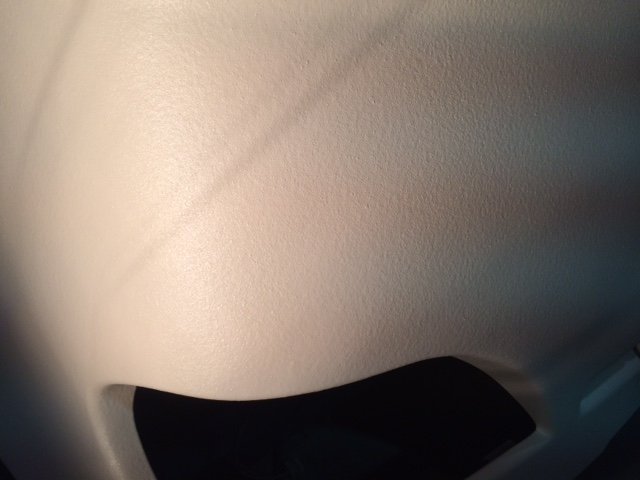 Vortex applied
By this time, your RV has at least 2 coats of Vortex and 4 layers of texturing. Now that the Vortex spray and texturing is applied, the first half of the process is complete.
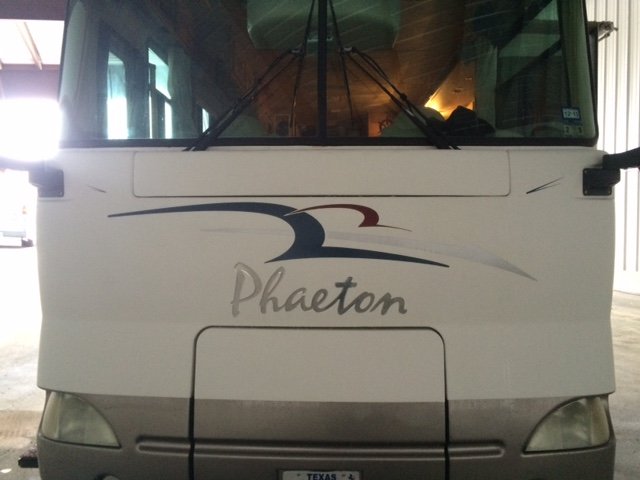
But Can They Match My Paint?
 Lead Painter Eric Manssen at work
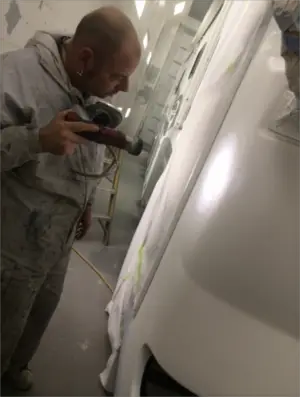 Erin Manssen inspects the quality of his work with a flashlight
Remember the first step in the Vortex process? The one where they took tons of up close and personal photos? This is where those photos come into play.
Once the Vortex application is complete, the RV is sent off to the paint bay. Iron Horse RV boasts a massive 50 foot, fully enclosed paint spray booth.
It’s time for the wizards of paint at Iron Horse to do their magic. Eric Manssen (Lead Painter) has 22 years of experience in the auto body and paint field. Aaron Gilmore (Painter’s Assistant), who has 2 years’ experience (as of this writing), works alongside Eric to complete the Vortex project.
Painting the Vortex Front End Cap (2-3 Days Depending on Special Graphics)
- Now that the rig is dry, the lines on the sides of the coach are matched to the photos taken of the front end cap prior to the Vortex application. Matching lines are taped off to replicate the original RV paint scheme.
- Masking of the RV takes place once again. They mask and unmask the front end of the rig multiple times throughout the rest of these steps, depending on what paint coats and colors are being applied.
- Two coats of Bulldog adhesion promoter are sprayed on first. This allows the Vortex to bond to the sealer that will be applied shortly.
- Three coats of Sherwin-Williams paint sealer (primer) are sprayed onto the entire front end cap. This gives something for the base coast to bite into.
- No less than three and up to seven coats of base paint (depending on color) are sprayed onto the RV. Iron Horse RV only uses Sherwin-Williams Ultra-7000 paint. This is top of the line stuff. They have their own paint mixing station with tinting colors to match the paint on the rig to exact specifications.
- Special graphics or custom graphics are added after the base coat dries. In our case, we had our RV Wanderlust logo and website airbrushed by hand by amazing local San Antonio motorcycle artist Davey Moreno. Davey, who has over a decade of experience as an airbrush artist, came highly recommended by Lead Painter Eric Manssen. If you’re interested in custom work, feel free to ask Iron Horse RV. They have tons of local connections. Prices on custom work are appraised individually through Iron Horse RV, based on the artist and coach.
- Once all graphics and design work are complete, three coats of high glamour urethane clear coat are sprayed on top of the paint work which now covers the Vortex.
- The RV dries for 24 hours.
- Mirrors are assembled and reattached, as are headlights, fog lights and any other parts removed for application of Vortex and paint. If needed, the headlights are buffed if dull and wiper arms and mirrors are painted.
 Our RV is taped off before painting
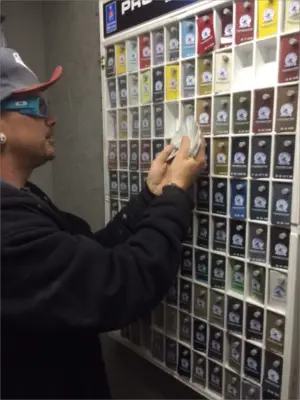 RV paint selection at Iron Horse RV
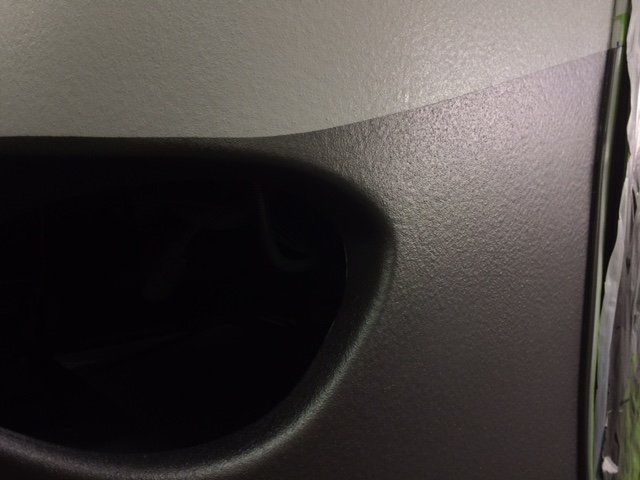 Paint atop Vortex
 Davey Moreno sketches an outline before airbrushing
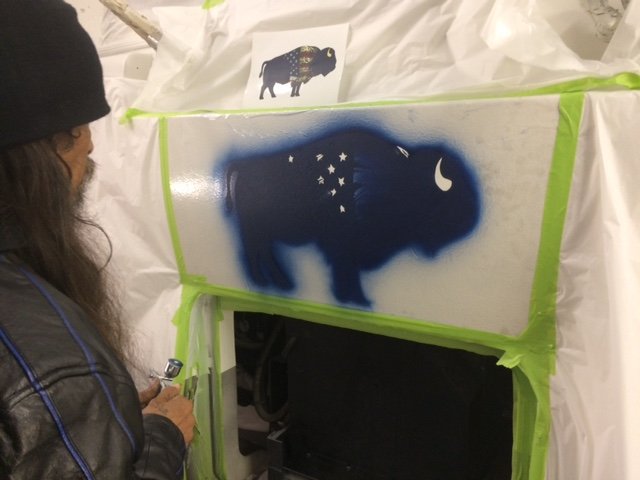 Our bison logo is airbrushed onto the front of Meriwether
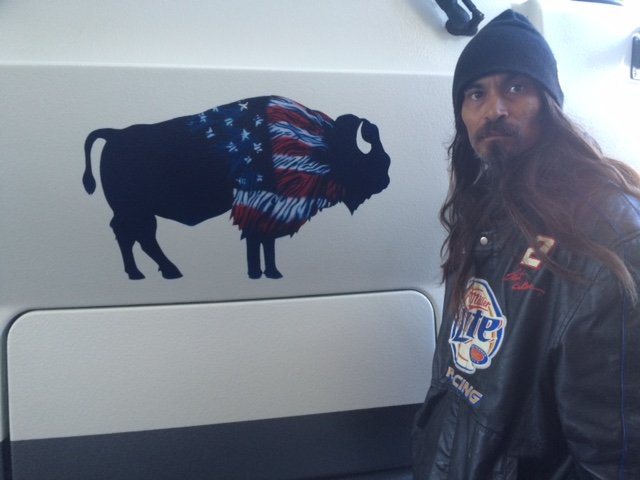 Airbrush Artist
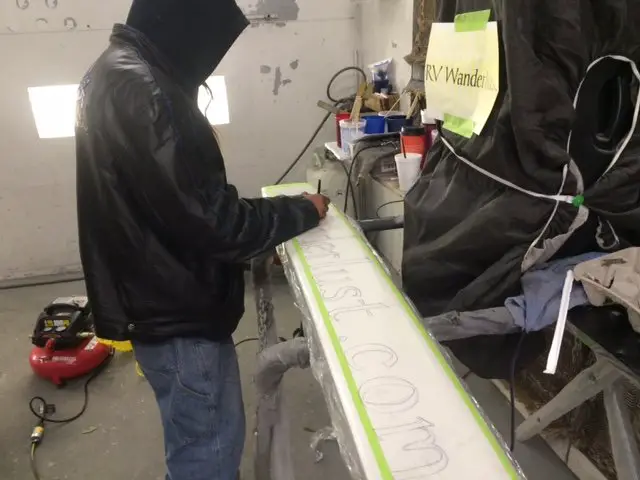 Davey draws our RV Wanderlust text by hand
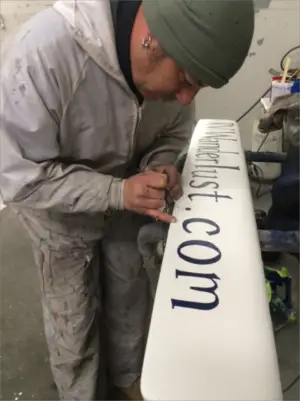 Eric touches up our RV Wanderlust text
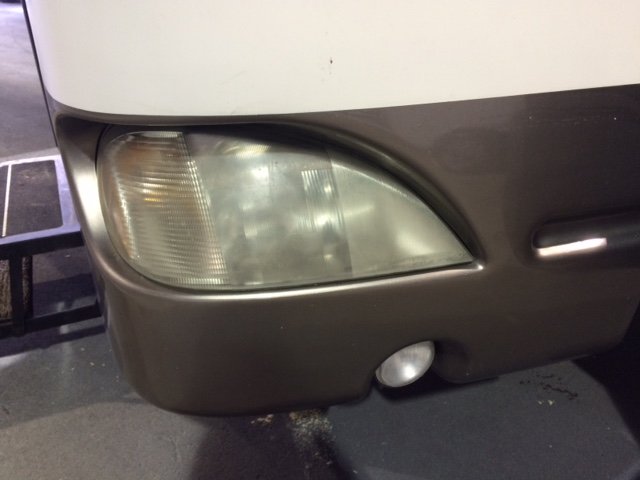 BEFORE: Our foggy headlight
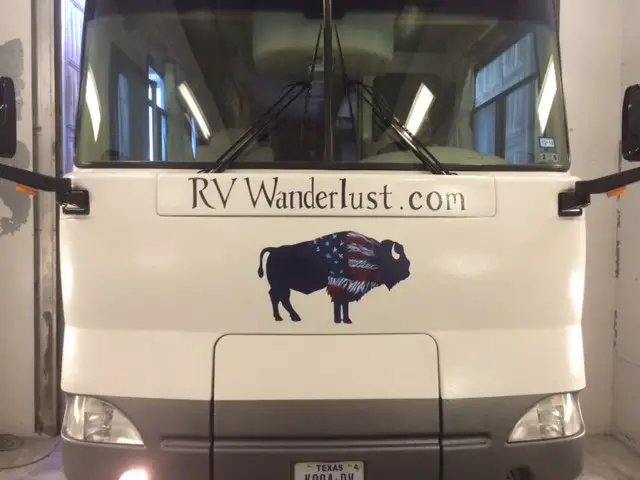 The finished product with painted mirrors and wipers, plus clean headlights
Ultimately, you’ll be looking at a gorgeous new front end cap that’s not only ridiculously durable, but also stunning in appearance. Believe me when I tell you that you’ll be happy with the results!
For those who lost track, your RV now has 2 full coats of Vortex, 4 texture coats, 2 adhesion coats, 3 sealer coats, 3-7 base color coats (depending on color) and 3 clear coats.
That is 17-21 coats of material protecting the front of your rig!
How Long Does This Take Again?
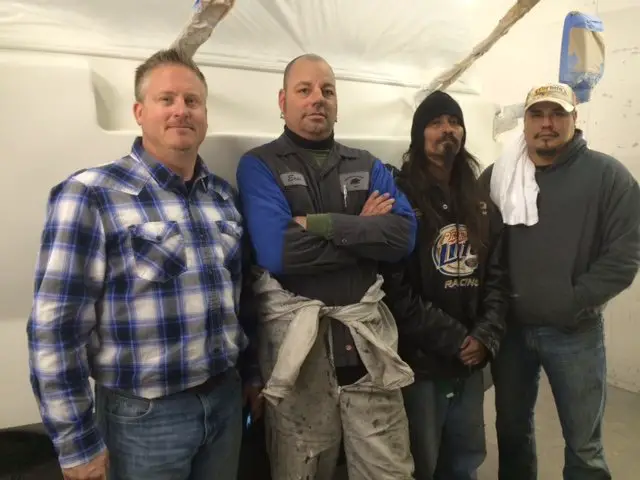 The Team L-R: Jared Hafley, Eric Manssen, Davey Moreno and Gino
The whole process takes 5-7 days. But don’t worry. Daryl Waldrop has a little spot in the back of his shop where we’ve stayed numerous times.
We lovingly call this place Camp Iron Horse. Really it’s just a parking lot for RVs, but it has 30/50 amp service, water and even cable connections. There is also a dump station on site. The use of Camp Iron Horse is free while getting work done at Iron Horse RV, so no worries there. It’ll save you a week of campground fees.
There’s a slight possibility you’ll need to get a hotel for 1-2 days during the painting process. Iron Horse RV has recommendations at the front desk. Our Vortex process took 5 days to complete and we spent 2 nights in a hotel during that time. The rest of the time we stayed in our RV each night.
Keep in mind that Iron Horse RV is closed on Saturday and Sunday. So 5-7 days means 5-7 business days!
How Much Does Vortex Cost?
The total cost of a Vortex front end cap without custom graphics is $3,995.00. Again custom graphics are appraised individually depending on the coach and complexity of the design.
But think about what you’re getting. For us, it’s literally the answer to our wish list we shared at the beginning of this article.
In short, the Vortex front end cap is the perfect protection for an RV’s front end. It’s gorgeous, more durable than 3M film, doesn’t crack, nearly has the tensile strength of concrete, is flexible, has 17-21 coats of material and bugs wipe right off! What more could we ask for?
Not only that, but for the majority (if not all) of the time you’re at Iron Horse RV, you can stay for free.
Final Thoughts on Vortex
I can’t tell you the number of compliments and questions we get on the road about our Vortex front end cap. We love it!
We haven’t seen a single bit of road debris or rock damage, and whenever we pull in for a stay, we take out a microfiber towel and wipe the bugs right off. Amen!
I’ve also personally heard from several other folks who have had their front end cap done (like Debi and Don Mallory), and they’re as thrilled with their work as we are with ours.
I’m really happy to be able to share Vortex with you all. Now when folks ask, we can point them to this article for more info. As you can see, it’s quite a process.
Feel free to comment below with questions. If you want to go straight to the source, shoot Iron Horse RV an email at service@ironhorserv.com.
-E


Wow that is an amazing process! The guy who did your bison is a real artist. Looks fabulous!
Nice job all the way around, in every detail. While some may be put off by the price and time it takes, it adds value to your RV and more importantly, peace of mind. Bugs don’t stand a chance now! :c)
It’s been a year now…Can you add an updated picture to show how this looks a year later?
@disqus_u4JH5lByZF:disqus, we have no complaints about how the Vortex has held up. There are just a few spots where rocks have hit us and taken away a tiny dot of paint, but you can’t notice it until you’re looking, and touching up the paint is a cinch.
It certainly helped you that you got it for free. The rest of us aren’t that lucky.