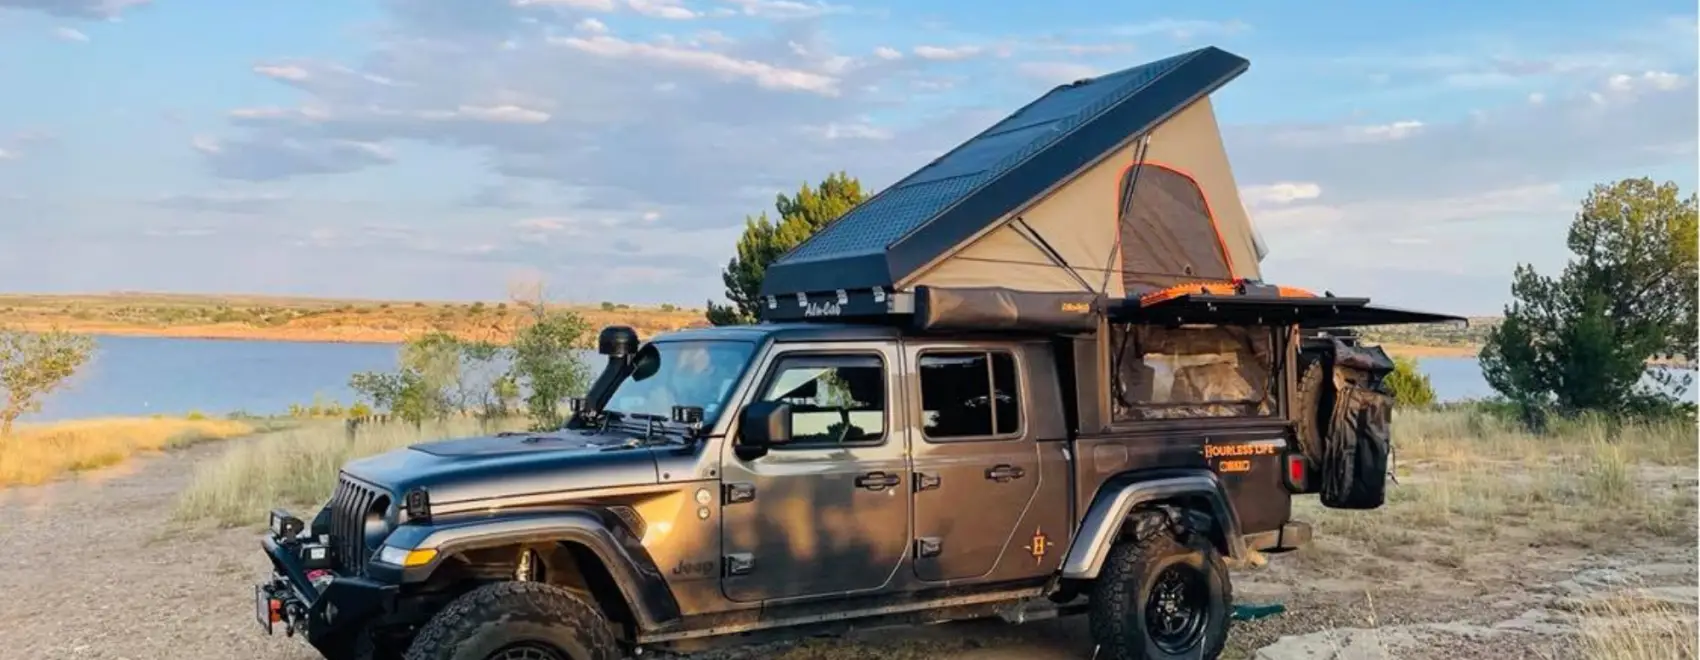
We picked up our 2021 Jeep Gladiator Sport S in Denver on May 31, 2021, after ordering directly from the factory. Our overland build process took 45 days, spanning four states and four shops. Though we documented the entire process on YouTube, nothing beats a comprehensive build sheet. If you’re curious about our living quarters, suspension, lighting, or other components, you’ve come to right place to see our complete Jeep Gladiator build sheet, designed for overlanding around the world.
People always want to know about money, so let’s get that topic out of the way. We have put a lot of our personal funds into this Jeep–our only home–and haven’t ever had a monetary sponsor.
We are, however, fortunate to have 27 gear sponsors behind us for our trip around the world. These companies have provided discounts on product or services, or in some cases product at no cost. Our gear sponsors will be noted in this article with an asterisk (*) at first mention. You can always browse the complete list of our gear sponsors on our site.
Lastly, you can also find out how much it cost to build our Jeep Gladiator, outfitted for global overlanding as you’ll see below.
DISCLOSURE: THIS POST MAY CONTAIN AFFILIATE LINKS, MEANING WE GET A COMMISSION IF YOU DECIDE TO MAKE A PURCHASE THROUGH OUR LINKS, AT NO COST TO YOU. PLEASE READ OUR DISCLOSURE FOR MORE INFO.
Alright, time to get down to business with our Jeep Gladiator build sheet.
Let’s talk payload
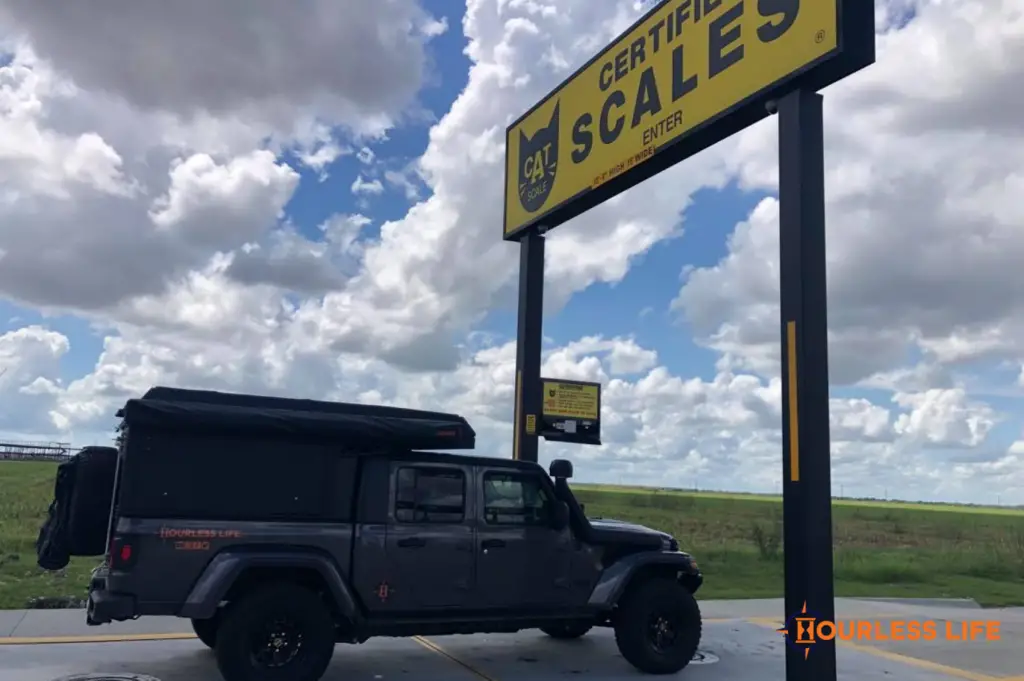
The most important addition we made to the base Sport S was the Max Tow Package. Only with the Max Tow Package can the Sport S achieve the highest payload capacity of any automatic Jeep Gladiator: 1,565 pounds. If you opt for the manual transmission, then payload is 1,700 pounds.
Other than going manual, no other Gladiator trim comes close to matching our payload. The Gladiator Rubicon has 1,200 pounds of payload.
We had to keep our goal in mind. We are driving around the world, not aiming for optimal rock-crawl capability. As a family living in our Gladiator full-time, carrying everything we need to be self-reliant, there was no choice but the highest payload available.
Other factory additions

In addition to the Max Tow Package with 4.10 axles, we added the Popular Equipment Package and upgraded to the 8-speed 850RE automatic transmission. We also got the auxiliary switch group to run our air compressor and Rigid Industries* lights at the front of the Jeep.
The color of our Gladiator is called Granite Crystal Metallic.
Before our Jeep left the dealership, the service department added Mopar rails, which are required for the installation of our habitat (see below).
Our living space on the road
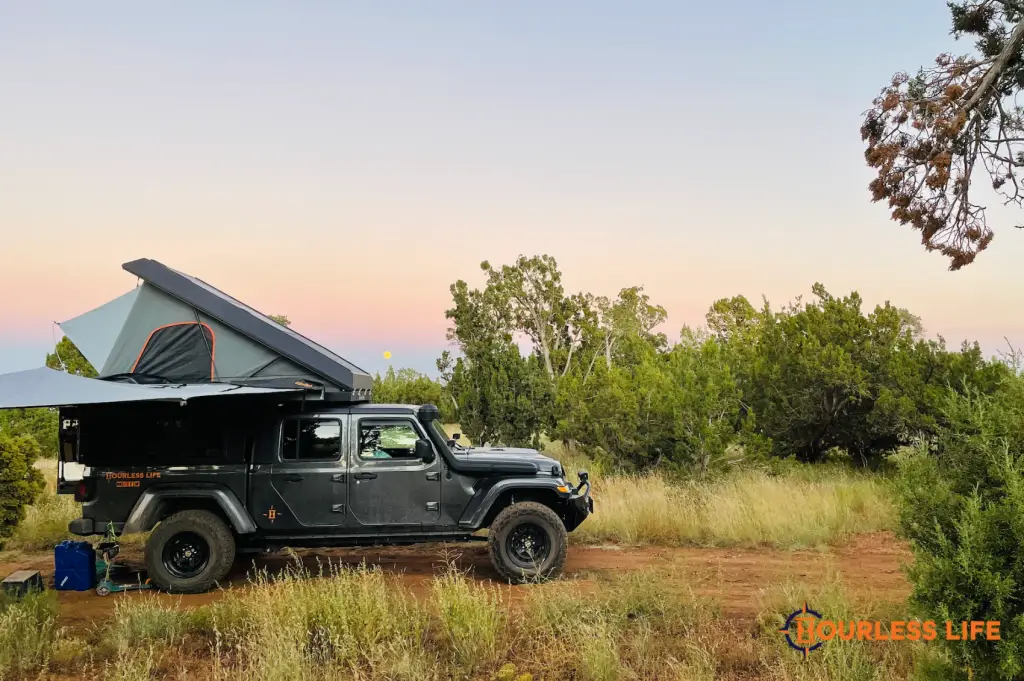
We live in an Alu-Cab* Canopy Camper, which was installed by Juniper Overland*, an Alu-Cab distributor in Denver, Colorado. After the tailgate is removed, the Canopy Camper seals over the bed of our truck. A full-size sleeping platform is accessible when the hard top of the Canopy Camper is deployed. Eric and I sleep in this bed.
Five National Luna LED lights (red/white), two dual USB/12V chargers, stalk lights, and solar pre-wire are included.
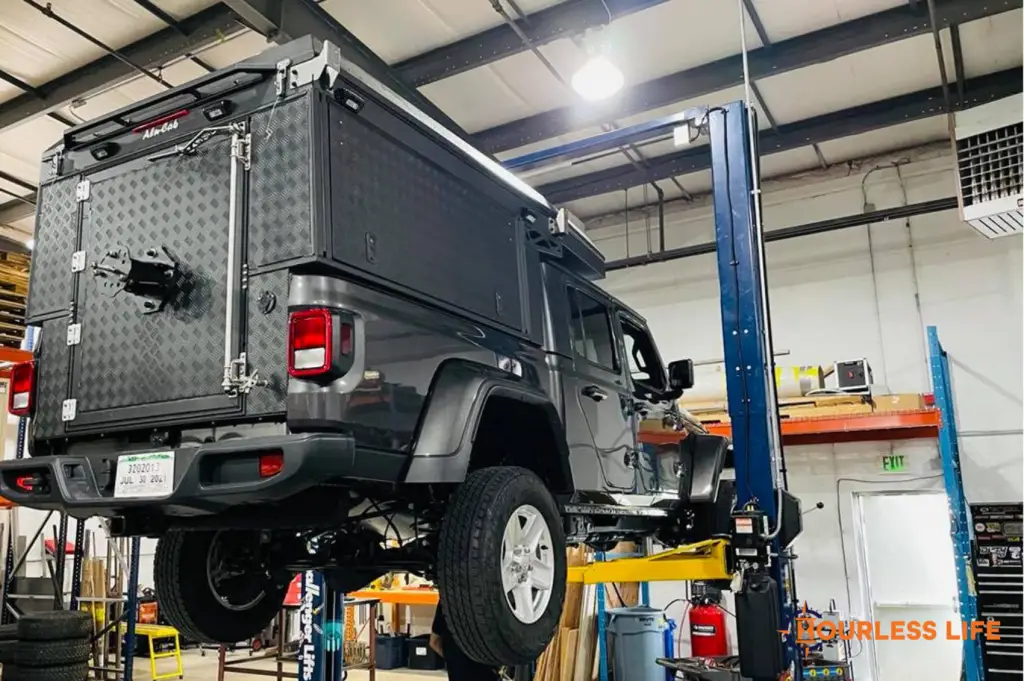
In addition, Juniper Overland completed the following installations:
- Midge nets on the side windows of the Canopy Camper to keep bugs out
- Rear door screen kit on the Canopy Camper
- Two GP Factor* drop-down tables inside the back door
- Alu-Cab 13-gallon water tank
- Water pump to shower nozzle
- Gravity-fed water spigot
- Alu-Cab storage bags on the water tank
- Alu-Cab Shower Cube (driver)
- Alu-Cab Shadow Awning (passenger)
- Shadow Awning gutter
- Spare wheel tire bracket on the back of the Canopy Camper (carries up to 33-inch tire)
- Exterior molle panel on the rear passenger side of the Canopy Camper
You can watch the install of our Alu-Cab Canopy Camper on our YouTube channel.
At Sonoran Expedition Collective* in Tucson, owner Brien Wankel designed two features to improve our organizational system.
The first feature is an aluminum hanging bar, fabricated by Sonoran Expedition Collective. It’s located inside the back door of the Canopy Camper at the top. I use this bar to hang my camp kitchen bags, which hold all of our utensils, cookware, and dishware.
The second feature is a hanging system inside the Canopy Camper made out of extruded aluminum and kayak pad eye tri-grip rivets. Using carabiners, we can hang bags full of lightweight items like bread and chips. Because there are rivets located all around our habitat, we can quickly move our bags to whatever part of the interior we want.
Video does much more justice to these features, so we encourage you to watch our video showing all of the modifications done by Sonoran Expedition Collective.
Clean side/dirty side
We implemented a “clean side/dirty side” layout for our Jeep Gladiator. Passenger is our “clean side,” with our awning, seating area, fridge, table, water spigot, and door entry with access to our pantry drawers.
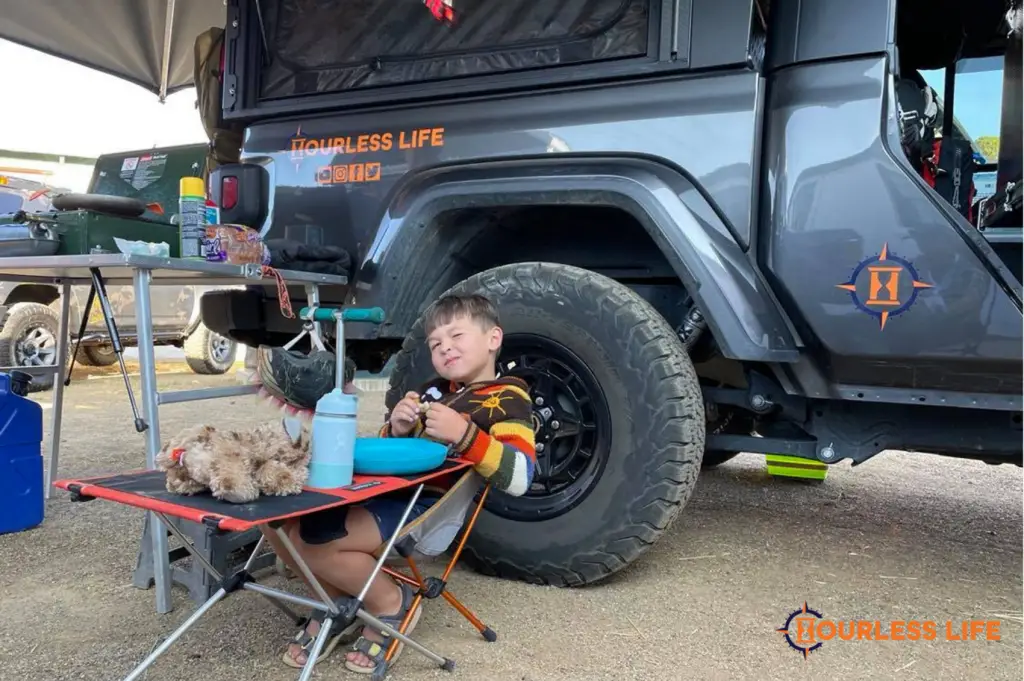
Driver is our “dirty side,” with our trash bag, mounted MaxTrax, and Shower Cube which often holds our toilet. If we need to use our shower nozzle, that also happens on the dirty side.
Because of this layout, we needed to have the Canopy Camper door flipped. We’ve never seen this done on another vehicle, but Alu-Cab assured us it could work, and Juniper Overland came through for us. Normally, the door opens from left to right. But our door opens the opposite way, right to left, giving access from the passenger side.
Interior storage
When we started thinking about our build, we were planning on DIY cabinetry. During 2020, we made crude, but intentional, sketches on paper of drawers, a seating area, and a place for Caspian to sleep.
Early in 2021, we looked at Goose Gear‘s* storage for the Alu-Cab Canopy Camper. It was almost identical to what we’d envisioned. At that point, it made no sense to muddle through a DIY process, when the perfect solution was already on the market.
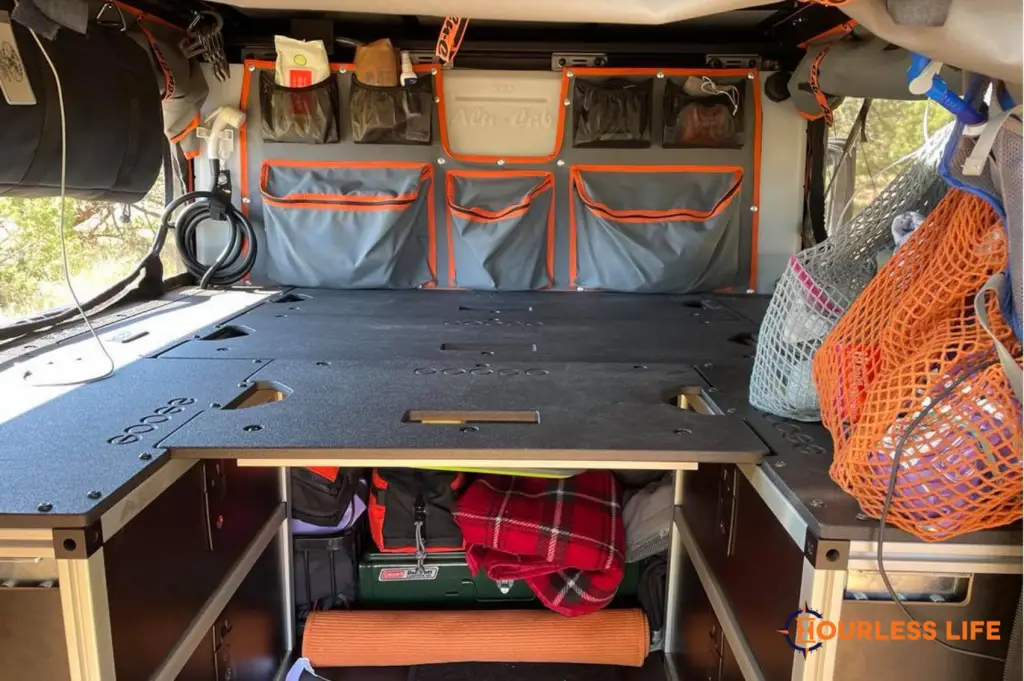
These are the storage units we sourced from Goose Gear:
- Universal deck plate to cover the bed of the truck
- Two double drawer modules
- Two rear utility modules
- Bulkhead panel, which you can adjust to create hidden storage
- Three sleep deck panels, which fit on top of the double drawer and utility modules, creating a sleeping platform for Caspian
- 60 High Seat Delete, leaving only Caspian’s seat in the rear of the Gladiator cab
- Solo Fridge Slide with cutting board, which holds our National Luna fridge from Equipt Expedition Outfitters*
- Corner unit to organize electronic components
You can watch a full video tour of our Goose Gear build-out on YouTube.
Heating
This is a huge improvement on our first overland build: we have a built-in heater now! We chose the Webasto petrol heater, which is tapped directly into our fuel tank.
The register is located on the driver side of our Canopy Camper, in the rear corner. This allows heat to come out near Caspian’s bed and rise to our sleeping area.
We were originally planning on using the Webasto diesel heater, which can come with a high altitude kit. But, in the end, we decided to simplify our system. With the petrol heater, we don’t risk mixing up gasoline and diesel at fuel stations, in countries where we don’t speak the language! We also avoided having to figure out where to install a diesel fuel tank.
Power supply and electric system
We are really proud of our electrical system, which provides more power than we can use.
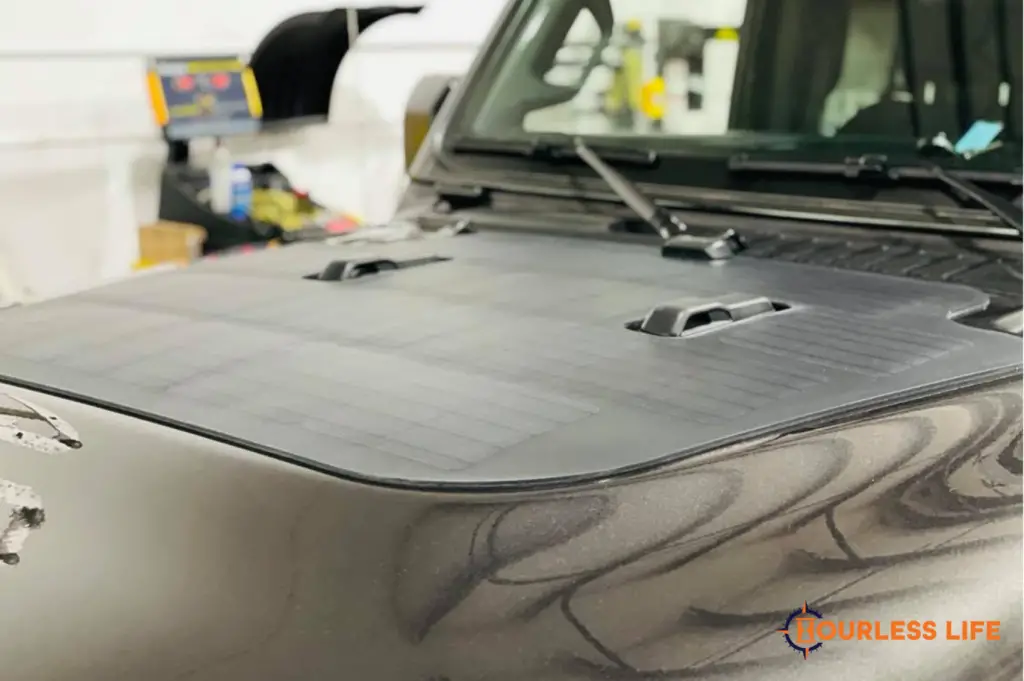
- Stock lead acid cranking battery, which also powers our winch, air compressor, Rigid Industries lighting, alarm system, dash cam, and fuel pump for auxiliary fuel tank
- Renogy* 170 amp hour lithium battery, located behind our Goose Gear bulkhead panel
- 280 watts of solar power by Cascadia 4×4*: the 80-watt VSS System on the hood of the Gladiator provides power to our cranking battery and accessory battery which come standard with the Gladiator, while two 100-watt panels are mounted on the roof of the Canopy Camper, providing power to our lithium battery
- Electrical plug for shore power, which runs to our lithium battery
- REDARC Electronics* Manager30 to control power inputs–alternator, solar, shore power–and show state of charge
- REDARC Electronics RedVision System to control power outputs via a full color panel in our habitat or the phone app
- 2,000-watt Cotek pure sine wave inverter, so we can safely use 110-volt power to charge our sensitive devices
- Power outlets installed by Sonoran Expedition Collective, connecting the inverter to Goose Gear corner unit
Here’s a walk-through our electrical system on YouTube.
Auxiliary fuel
We added a Long Range America* fuel tank to get 17 extra gallons of fuel onboard. The installation was done at Sonoran Expedition Collective, an official distributor for Long Range. Our stock tank holds 22 gallons, so we now have the ability to carry 39 gallons of fuel total.
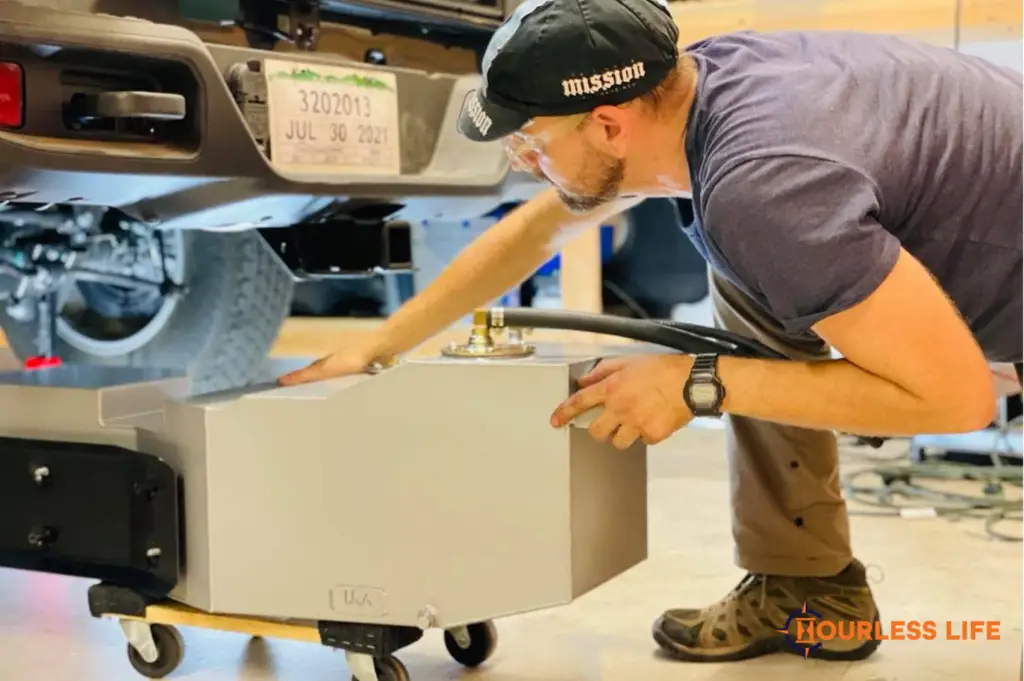
Reasons we went with Long Range America:
- We’d rather not carry auxiliary fuel containers on the outside of the Jeep where people can see them because fuel is a high-value commodity in many countries around the world. The Long Range America tank is tucked away underneath the Jeep.
- We don’t have to add fuel weight if we don’t want to. We usually only carry the stock 22 gallons for payload reasons, but…
- We can fill up the Long Range tank when we need the extra range, or want to purchase cheaper fuel before crossing a border into an area where fuel is more expensive.
- We fill up the Long Range and stock fuel tank at the same time, the way anyone would pump fuel.
- Using the Long Range tank is as simple as the push of a button, which is located right next to the driver. We pump fuel from the Long Range to our stock fuel tank while we’re driving.
- We don’t lose clearance. While the tank is an inch or two lower than the frame, it isn’t lower than other components under the Gladiator. It’s a 1/4-inch lower than the stock fuel tank.
- We don’t lose the spare tire space underneath the Gladiator.
- We also love the placement of the Long Range tank on the Gladiator. It’s on the opposite side of the Jeep from the stock fuel tank, which means it balances out the geometry of the vehicle when full. Cool, huh?
Suspension
Just Jeeps* has been our mechanic shop since before we knew what overlanding was. We were customers first, back when Austin, Texas, was our home base and we were building our Jeep Wrangler for off-roading.
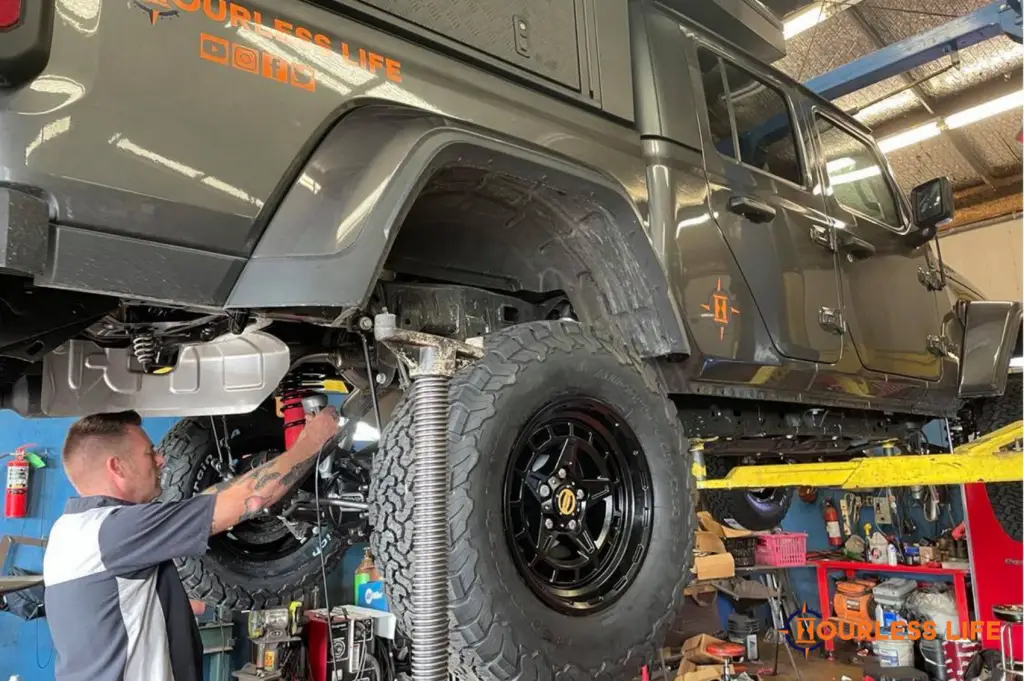
We took our Gladiator to Just Jeeps in July 2021 to complete our overland build. They modified our suspension with the following components:
- 2-inch Mopar lift kit with standard Fox shocks (we’re waiting on Teraflex Falcon shocks, which are currently unavailable due to supply chain issues)
- Teraflex* bump stops
- Upgraded 3.5-inch rear coil springs (note below)
- Air Lift rear air bags, which are designed to support 1,000 pounds
- Hellwig rear sway bar
Just before we crossed into Mexico, we changed to Dobinson’s* dual rate rear coil springs, which are rated for 500 kilograms (1,100 pounds). We are carrying well under 1,100 pounds on our rear axle and this upgrade was the most noticeable change we made to our suspension at any point in the build. Thanks to Johnson Automotive in Austin that got us in at the last minute for this mod.
See all of the excellent work done at Just Jeeps on YouTube.
Other exterior modifications
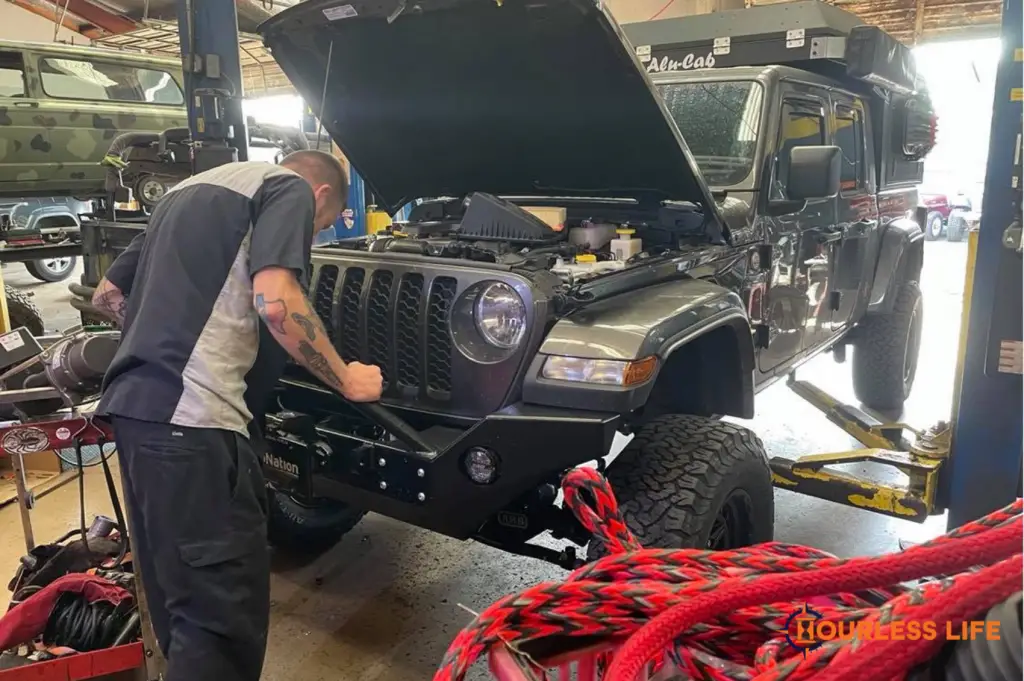
Besides building out our suspension system, Just Jeeps did a ton of other important work on our Jeep Gladiator:
- WARN Industries* 9.5XP winch with Spydura Nightline synthetic winch rope and HUB wireless controller
- WARN Diamond Cutter wheels
- 33.5-inch BFGoodrich KO2 All-Terrain tires
- Rigid Industries* lights: two spot lights, two flood lights, two fog lights, 10-inch E-Series Pro light bar
- Rock Hard 4×4 aluminum front bumper
- AEV snorkel with Sy-Clone pre-filter
- ARB air compressor on Wayalife mount
- ARB diff covers, front and rear
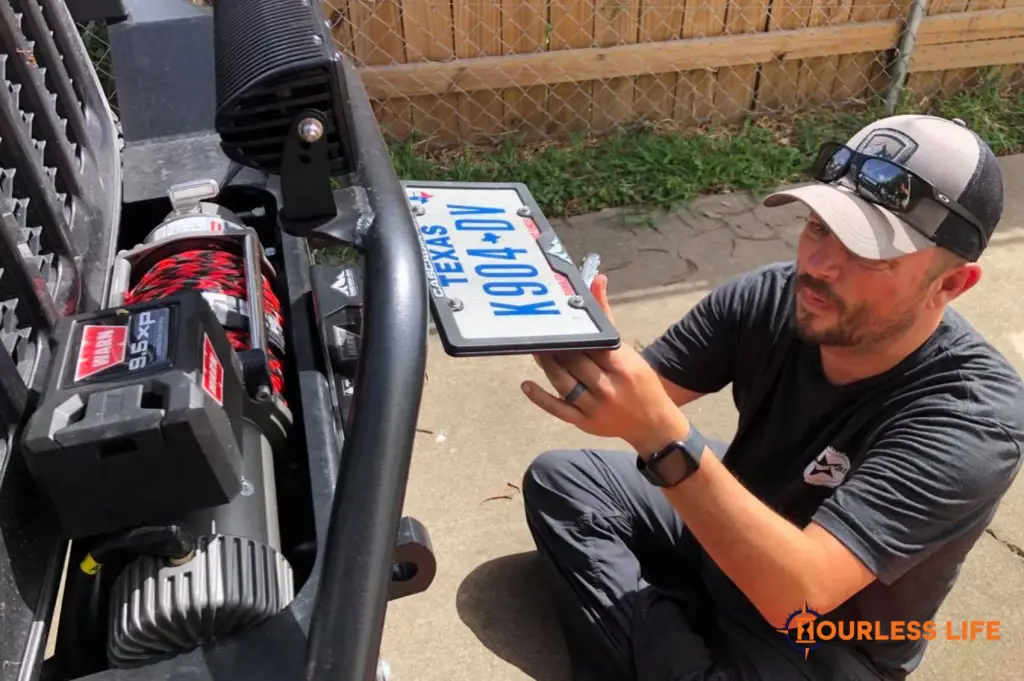
There were a few final exterior modifications that haven’t been mentioned yet:
- Rigid Industries Scene lights in white and amber (Juniper Overland)
- Cascadia 4×4* Flipster, which holds the front license plate while allowing access to the winch
- Locking gas cap
- MaxTrax from Adventure Imports* and Expedition Essentials mounting system (Juniper Overland)
- Stubby antenna
Other interior additions
Almost done! These were the final modifications made to the interior of our build. The shop that installed each item is also noted.
- 67 Designs* JL Rail Mount / Gladiator Series 55 Rail Mount, camera mount, MagMount G3 device holder, and accessories
- Rexing S1 dash cam with forward-facing and passenger-facing cameras (Sonoran Expedition Collective)
- Blue Ridge Overland Gear* attic to hold our jackets and hats, which is actually made for the JL and requires brackets to work in a Gladiator (Sonoran)
- “Table” cover for Webasto heater ducting, so it doesn’t get crushed (Sonoran)
- Custom-fabricated molle panel for back corner of the Canopy Camper (the corner that doesn’t have the Goose Gear corner unit), to hang a fire extinguisher and first aid kit (Sonoran)
- Viper alarm system (Far Beyond Tint in Corpus Christi, Texas)
- GP Factor* molle panels, which mount inside the side wing doors of the Canopy Camper on inside the back door
Purpose-built to drive around the world
As you make your own plans, please remember the context of our build. If we were designing a vehicle strictly for North American travel, then it would be completely different from this Jeep Gladiator. We built a vehicle we could drive around the world.
So while it’s important to see what’s on our build sheet, did you notice what’s NOT on it? Did you notice we don’t have any propane, ultra low sulfur diesel, major modifications under the hood, or big tires? These were all intentional decisions for our specific goal of driving the world. With different goals, your build could be much different–and that’s okay.
Our Jeep Gladiator build sheet
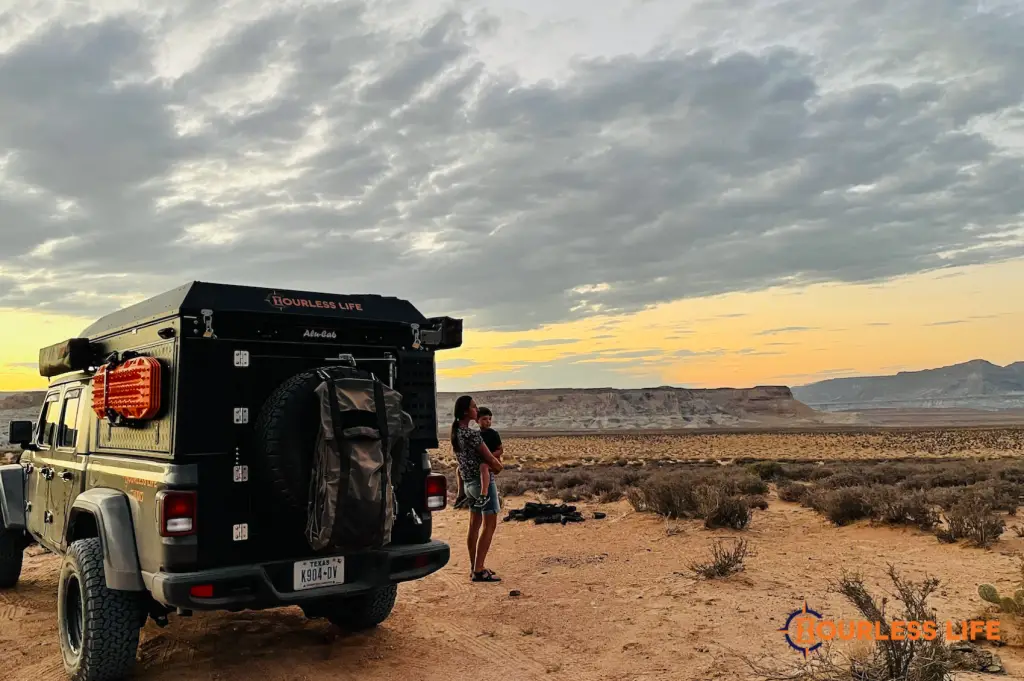
This ended up being a much bigger project than a “build sheet,” but I think it’s important to explain why we made some of the modifications we did.
If you read this far, thank you. You might appreciate a full walk-around tour of our Jeep Gladiator, to see how the components ended up coming together. We promised this video over the summer, and we hope to have it available on our YouTube channel before the end of 2021.
I’m so grateful for how our Jeep Gladiator overland build came together. There were so many complicated systems and more than four shops ended up contributing to the build. We dealt with supply issues, shipping delays, and missing parts. It was a lot.
But it’s done, and we’re so pleased with the final result: our home on wheels!
-B



Wow guys! So much thought and planning went into your build. What a great community of sponsors too!
As we are now new Gladiator owners, we so appreciate the work that went into your build sheet and explanations of all the mods! Thank you both so much! It must feel so surreal that your actually on your journey life now.👏♥️🙏
Thanks so much, you two! It’s encouraging to hear that you’ll be able to use our build list to help in your research process. If any questions come up, then just drop another comment! Obviously there’s so much more that could be said here–a full article could be written on almost every component, explaining how we chose it for this journey!
Wow! Thanks for sharing such an in depth post about your Gladiator. I’m impressed with all the work it must have taken to come up with the perfect customization for your family.
Aw, thanks so much, Allison. It was a very long and complicated process. But all the hard work paid off. We’re so pleased with the home on wheels we ended up with.
I do not see the GVWR posted after your visit at the scales? Also, I am guessing your axles are overloaded as well? It would be interesting to know how the truck is balanced out with your set-up according to the GVWR stickers on the door?
Oh, it’s interesting alright, but interesting at our expense. ;) In all seriousness, payload is a sore spot for us. Months before we’d ordered the Gladiator, not to mention started making modifications, we had a detailed spreadsheet so that we would stay under payload. And we were under on the spreadsheet. But when all was said and done (it was a whirlwind of a build, in 45 days and 4 states), we were over. Plan B was to beef up our suspension to support the weight, which we did. I think the rear axle was over by 700 pounds or so (obviously more weight on the rear than the front), so we opted for the Dobinson’s dual rate coil springs, which are rated for 1,100 pounds. We also have air bags, so between the two the ride feels solid and our rake is correct. In a perfect world, we would be under payload. But there are worse things, like not going at all.
Thanks, Brittany, I was only curious as I have the same set-up (Rubicon Gladiator with Alu Cab) My numbers are all close to specifications, I travel light and am an experienced overlander (Borneo, Alaska, South America) but I have this new set-up and noticed on emergency braking the rear wants to come around quickly, can I ask does the Helwig swaybar help? I am dialing in the set-up with weight distribution and gear but overall it is a high center of gravity set up with Alu Cab, roof rack, and gear. Thank you and stay safe in your travels!
Hey James, the sway bar does make a noticeable difference. Others we know (who recommended it to us) say the same.
We are happy with our weight distribution. The Alu-Cab water tank keeps that weight centered. And then we use the Goose Gear high seat delete in the back of the cab for storing our tools and recovery equipment, which keeps that weight centered and low.
Hi James,
One of the basics of vehicle dynamics is that as you increase roll stiffness on one end of a vehicle, that end becomes more likely to break loose.
So while its counterintuitive, increasing rear roll stiffness will actually increase any tendency for the back end to come around in an emergency maneuver.
But don’t take my word for it. Google “roll stiffness and oversteer” . You will find many articles on this correlation.
This is not to say that the truck won’t feel better with a stiffer rear roll bar. But just that it may actually be less predictable at its handling limit.
ideally you would increase both roll bars stiffness by about the same percent increase on each.